Are you looking for a simple way to block a particular webpage on your Windows 10 PC? Do you want to speed up your browsing? Do you prevent your Windows PC by blocking malicious websites? Then that this all can be achieved if you know how to edit the hosts file in Windows 10.
So, without further ado, let’s quickly learn the easiest way to edit Windows 10 host file.
What is Host File in Windows 10?
In simple terms it is a text file stored locally on your computer that maps the friendly and easy to remember host names too hard to remember IP addresses. It is quite obvious that for a human mind it is hard to remember IP addresses like 64.233.160.0 as compared to domain name google.com.
Now, when looking for an IP address your computer initially searches the host file for resolving the name. If it is not found in the local hosts file, then try to resolve it using Domain Name Service (DNS).
Where is the Host File located in Windows 10?
Before learning how to edit hosts file it is important to know about hosts file location in Windows 10. The Windows 10 default hosts file is located at path C:\Windows\system32\drivers\etc with few comment lines.
So now since you have information on what is host file and where it is located let’s learn how to edit hosts file in Windows 10.
Steps to Edit Hosts File in Windows 10:
As stated earlier in the article, that the hosts file is a text file containing some text in it. So, to edit this host file you just need a text editor. And now since the host file contains just the basic text, therefore, you can use a basic text editor tool like notepad (by default installed on Windows operating system) to edit hosts file in Windows 10.
Also Read: Is INK Editor The Best Document Editor App
Please note that to make any changes in the Windows hosts file you need to have administrative privileges.
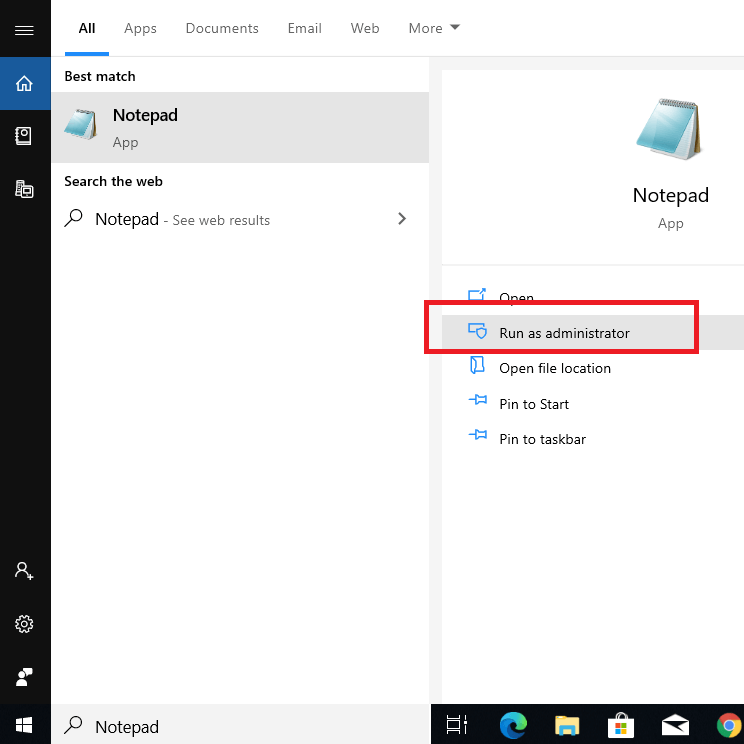
1. To get started type Notepad in the Windows Search and click on the option Run as administrator.

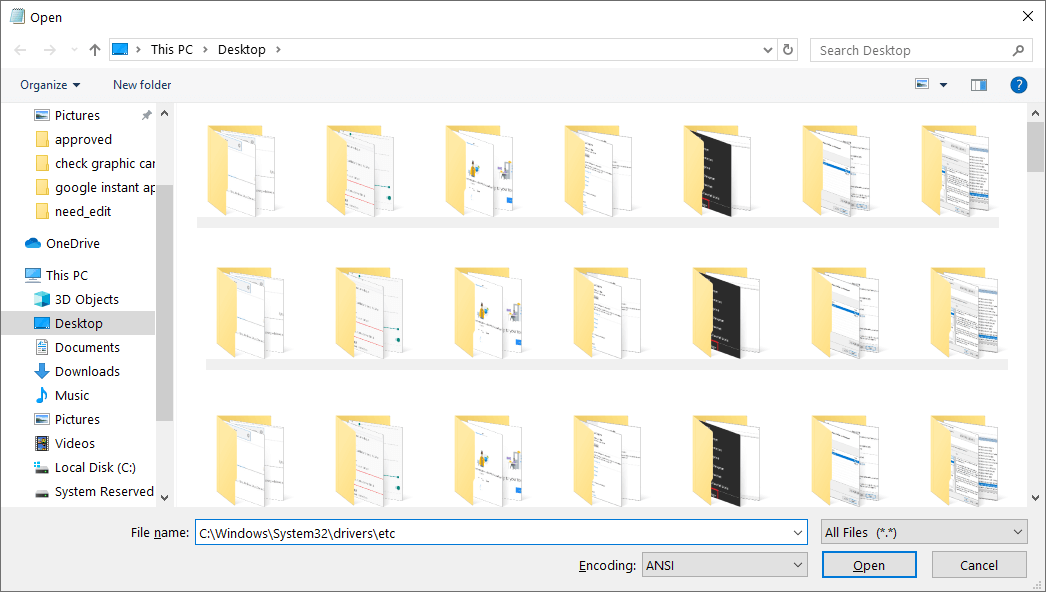
2. Once the Notepad is opened click on File tab and from the down list select Open. You can also directly press Ctrl + O.
3. In the Open File dialogue box that opens type C:\Windows\system32\drivers\etc in the ‘File Name’ field. Also switch to All Files and click on the Open button.

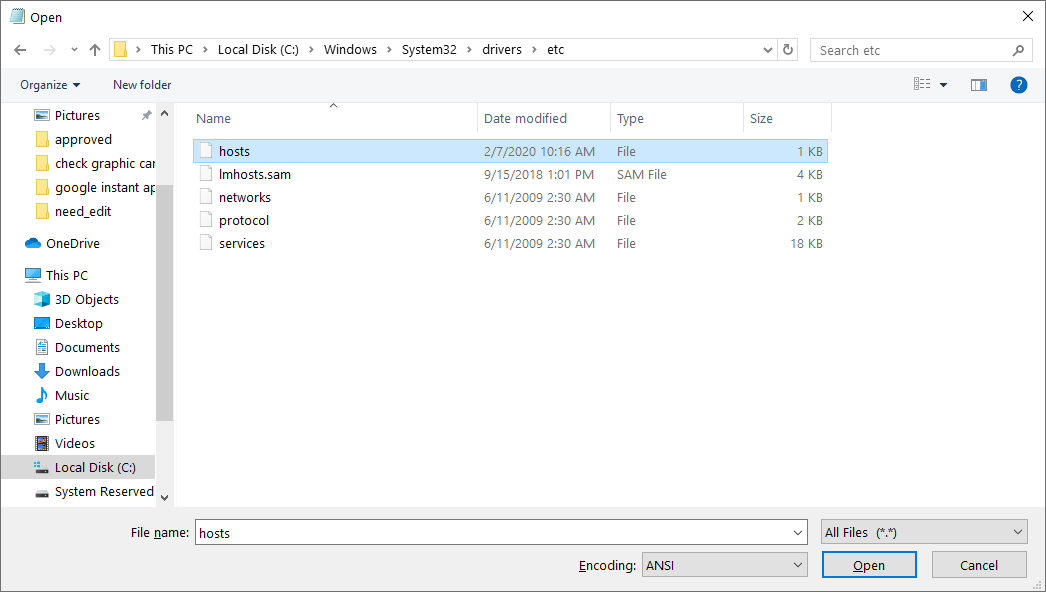
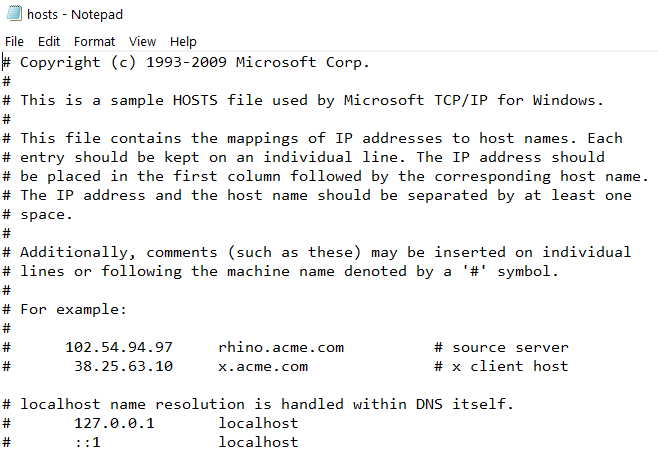
4. Now select hosts file and click on the Open button. This will open Windows Hosts File in Notepad.

5. Now, you can make the required changes to the hosts file. Once done click on Save option to save the file.

Editing Windows Host File:
There are a few examples in the hosts file itself that can help a user in how to put the entries. The standard format is putting the IP address first and then followed by the domain name, and each separated by a space.
Please note that the comment symbol “#” means that anything that is written after it will not be read.
Now if you want to block any specific website like YouTube or Facebook then enter a false IP address in the same format as shown in the example of hosts file.
Why Do We Need to Edit Hosts File?
It is quite true that a normal user never requires to edit a hosts file. However, there are certain tasks that can be accomplished easily if you know how to edit a hosts file.
- For blocking a particular website from being accessed by mapping it to an incorrect IP address.
- Entirely, bypassing your DNS server by mapping a website to their correct IP address in the hosts file itself, resulting in the better browsing experience.
- A user can investigate a hosts file to check whether a hosts file is deliberately edited by a virus.
So, guys, this is how you can easily edit hosts file in Windows 10 and block any website with ease. Do let us know in the comment below if you like the article.


Leave a Reply