
Windows provide different ways to customize icons. It is a great way of personalizing your PC.
Windows have provided different built-in icons you can choose from, also there is an option for downloading the icons from the internet which contains many free icons.
You can also set a personal image as icons, in case you wish to use personal icons or images.
Change Desktop Icons (Computer, Recycle Bin, Network, etc.):
Desktop contains many icons like Computer, Recycle Bin, Network, User’s File and Control Panel icons.
To change the icon of the specific Desktop item you can follow the steps below:
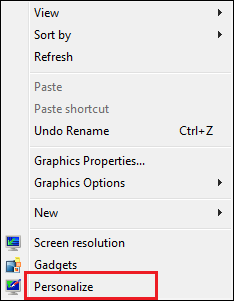
- Right click on Desktop and select Personalise.

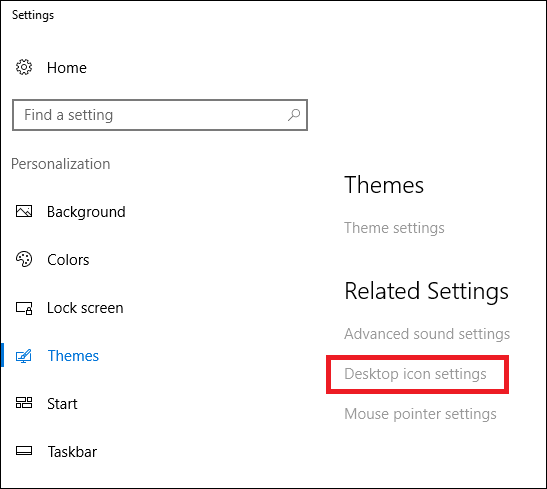
- From the window that opens click on Change desktop icons present in the left panel.
Note: In Windows 10: Themes > Desktop Icon Settings
- From Desktop Icon Settings window, select the icons you want to change and then click Change Icon button.
Note: Use the check boxes under Desktop Icons to select which icons you want to display on your desktop. - In the Change Icon window, you are given a list of built-in icons. Choose an icon of your choice from the list or you may also click Browse to select your own icons.
Note: Personal icon file should be EXE, DLL, or ICO file.


After selecting the icon, click on OK. Your icon will be changed.
Change Folder Icons:
You can also change the icon for the specific folder as per your needs. To change the icon of a specific Folder, follow the steps below:
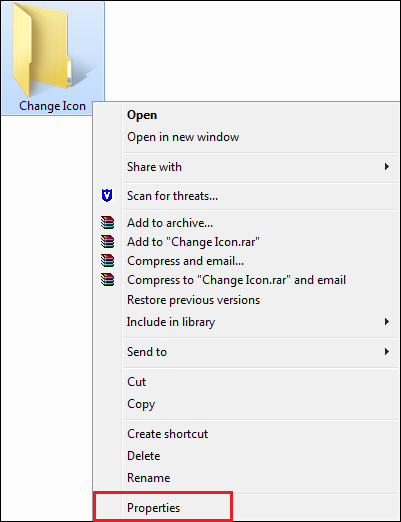
- Right-click on the folder you want to change the icon and click on Properties.
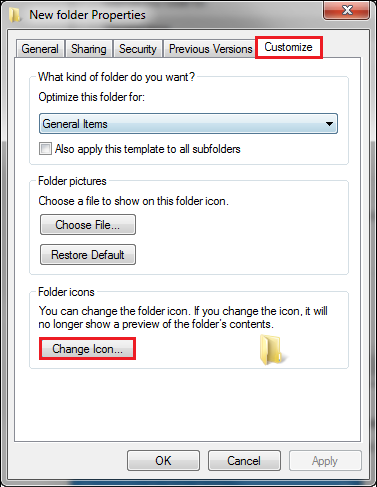
- In the folder’s properties, click on Customize tab and then click on Change Icon button.
- In the Change Icon window, you can select any icon you want from the built-in icons or you can Click Browse to select your own icons.
Note: Personal icon file should be EXE, DLL, or ICO file.
After selecting the icon click on OK. And again, click on OK in the properties window. Your icon will be changed.
Change the Icon of Any Shortcut:
Changing the icon for the shortcut is pretty easy. To change the icon of a shortcut, follow the steps below:
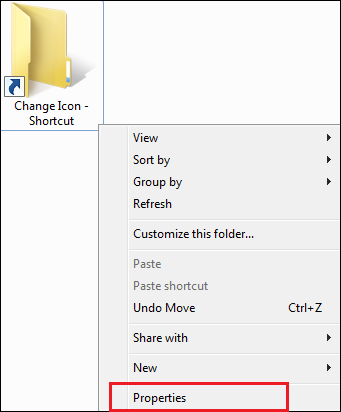
- Right-click on the shortcut you want to change the icon and click on Properties.
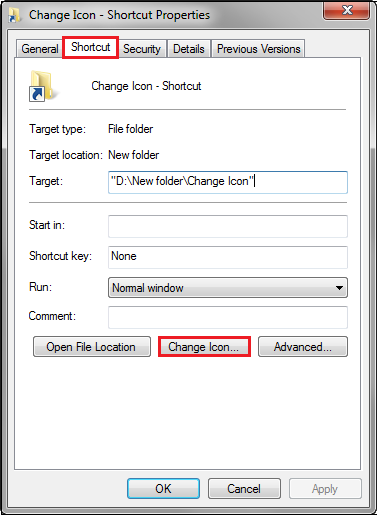
- From the Change Icon window click on Shortcut. Here click Change Icon button.
- In the Change Icon window, you can select any icon you want from the built-in icons or you can Click Browse to select your own icons.
Note: Personal icon file should be EXE, DLL, or ICO file.
After selecting the icon and applying it, you’ll see the new icon in File Explorer, on the Desktop, or on the taskbar if you have your Shortcut pinned there.
Change the Icon of the programs that are pinned to the Taskbar:
Programs that are pinned to your taskbar are shortcuts, as one can only see their respective icons. You can customize their icons in the same way that you customize any shortcut icon.
If the program is running but not pinned to the taskbar, then you will not be able to customize its icon.
Also, whenever you wish to change the icons for application shortcuts pinned to the Taskbar, make sure you close the application before applying the changes.
To do so, please see below:
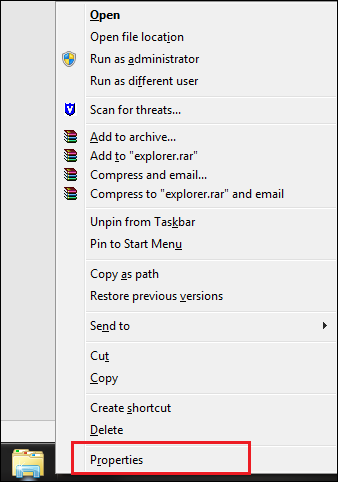
- Hold Shift key down while right-clicking the icon of the pinned program that you want to change the icon and click on Properties.
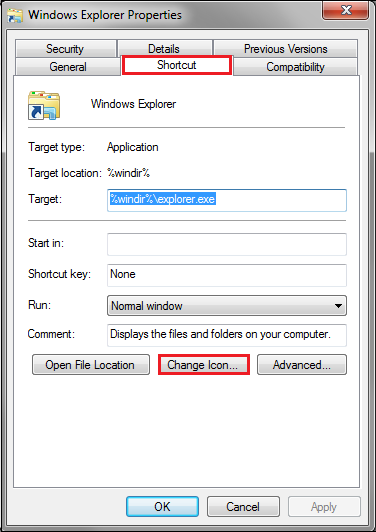
- Under Shortcut, click on Change Icon button.
- In the Change Icon window, you can select any icon you want from the built-in icons or you can Click Browse to select your own icons.

Adding a personal touch to the icons can be a fun thing to do. And see it’s that easy!!


Leave a Reply