As per Forrester’s research, more than 2 billion computers are being used today. But how many of these are customized? The truth is over 50% of these computers used are being used in the default stated as shipped by the OEM. People use their computer for carrying out many tasks including professional and leisure but don’t spend time customizing it. There is always a fear that it might damage the settings. But the matter of fact is that the computer manufacturers have themselves provided the users, some features and options to customize their computers as they like it.
So, let go of the fear and spend some time customizing your computer, tweaking a bit to make it easier to use and different from the millions of computers out there.
How to Customize your Start Menu
Customization of the start menu in Windows 10 can be done by a couple of steps, Customization includes
- Adding an App to the list.
- Deleting an App from the list.
- Creating a group of Apps.
Before moving ahead, one important thing to consider is that the apps are categorized into two groups, System Apps and Other Apps. The only major difference is that the system apps are preinstalled with the OS and cannot be removed from the start menu app list. Only the apps which have been manually installed can be removed.
To customize the Start menu list of apps, follow the following steps:
- Click on the start menu at the bottom left corner of your screen and locate the app shortcut in the start menu.
- Right-click on that app and a small menu appears with one of the options labeled as ‘More’. Bring your mouse pointer on ‘More’ and the menu will extend further towards right displaying other options. Left-click on the option labeled as ‘Open File Location’. A folder will open which contains shortcuts of all the apps installed on your computer. The directory path of that folder would look like this:
C:\ProgramData\Microsoft\Windows\Start Menu\Programs - To remove any app from the Start Menu, locate the shortcut of that app and delete it.
- To add a shortcut, create the shortcut first of the executable file of that app and then paste it into this folder.
- To organize the apps into folders, create a folder, rename it and add the shortcuts in that folder. The below image will help you to understand it better.

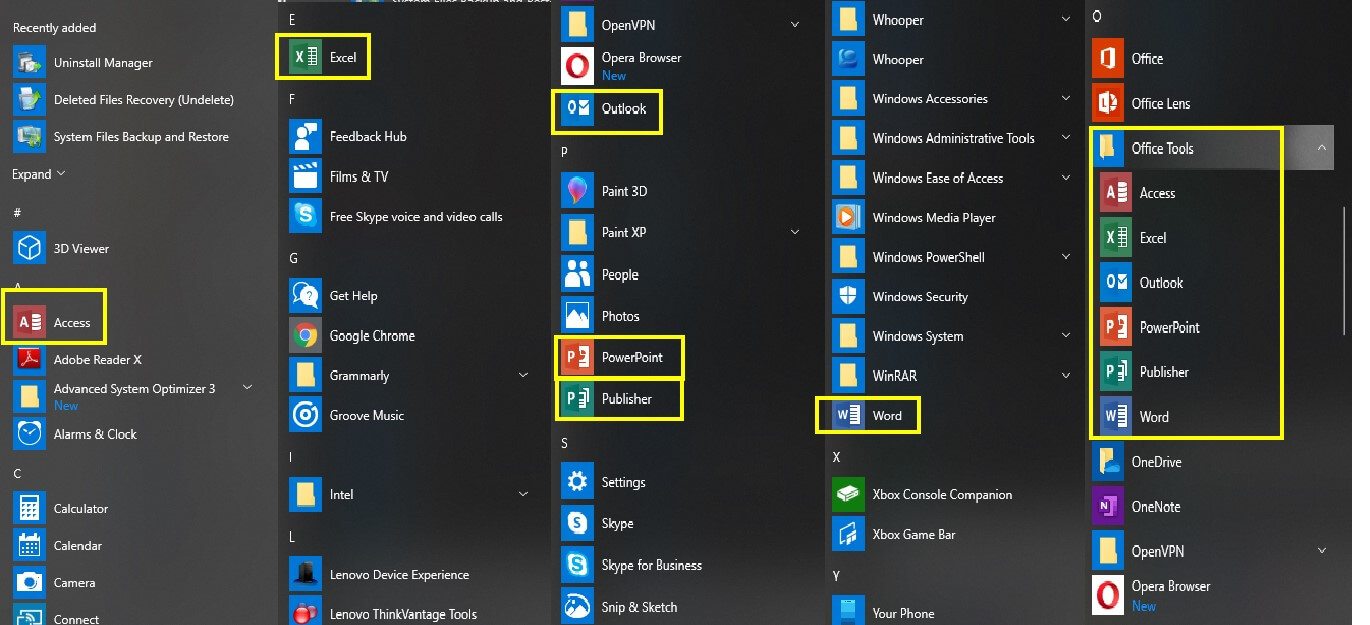
Microsoft Office applications appear individually in the Start Menu categorized by their initial alphabet. A folder can be created in the Start Menu folder and renamed as ‘Office Tools’. All the Office applications like Word, Excel PowerPoint can be then pasted in that folder. The result is displayed in the last column of the image where all the Microsoft Office apps are grouped together. You can create custom folders and organize your games, photo editing apps, etc. in one folder. The results of the changes made in the Start Menu will be instant.
Windows 10 provides its users with an option to customize which programs should automatically start when the computer starts. To check the list, and turn on or off the apps listed, follow the following steps:
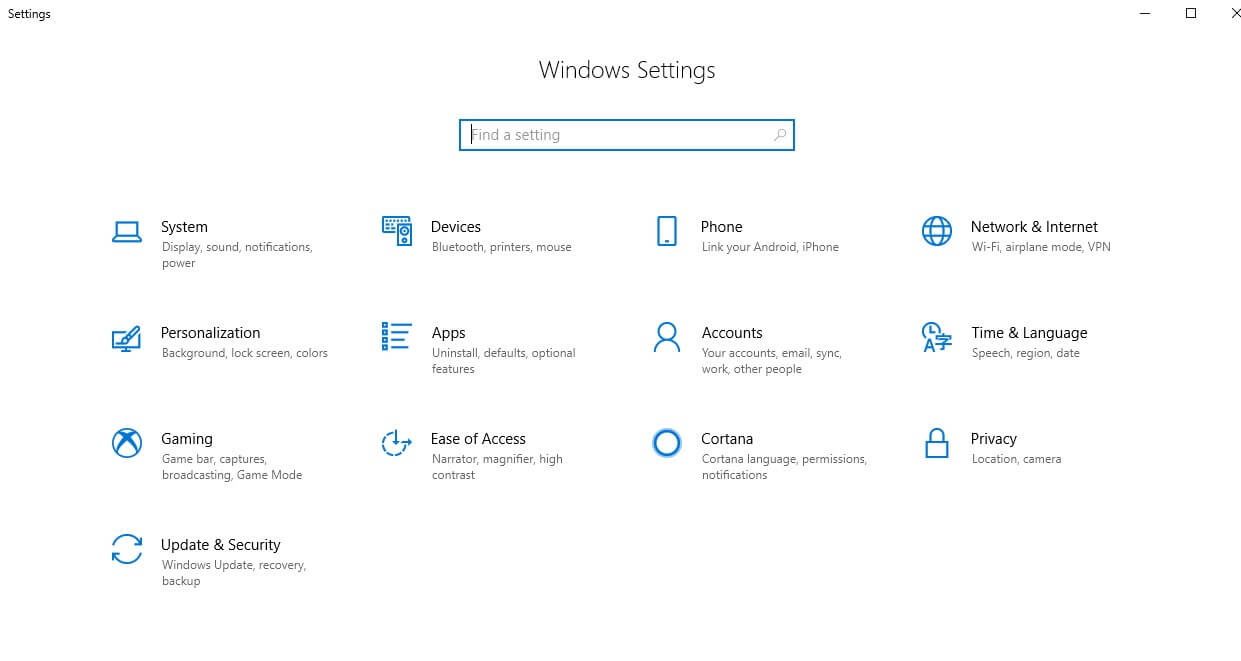
- Open Settings either by clicking on the Start button and scrolling the list of apps all the way down to the letter ‘S’ or just type ‘Settings’ in the search box located next to the Start button.
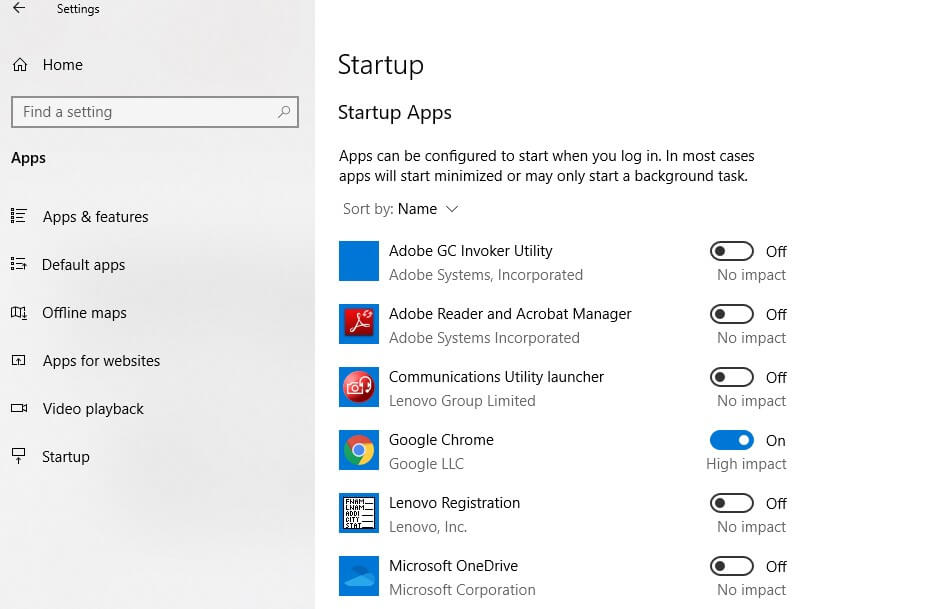
- Choose Apps from the Settings window. Choose the Startup option from the list on the left.
- You will see a list of apps on the right side of this window with a toggle on/off button.
- Most of the apps listed here will run in the background when the computer starts. Some of the apps are very important. Do not turn off any app that you aren’t aware of.
Alternatively, if you want to use the classic method prevalent in the previous version of Windows, try the following steps:
- Right-click on the taskbar and select ‘Task Manager’ on the menu. A new window will open.
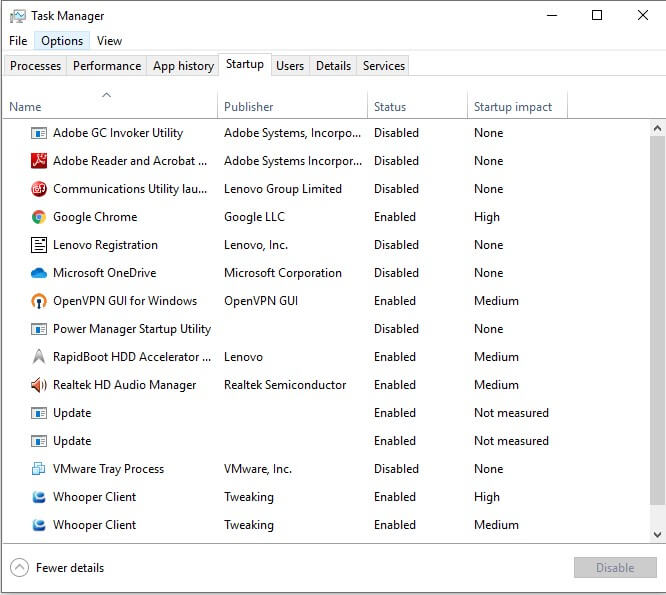
- Choose the ‘Startup’ tab and a list of all programs that auto-start on computer boot will be displayed.
- The status of each app and its impact will also be displayed. Users can enable/disable the apps as per their discretion.
However, these steps do not provide the user to add/delete any app. It only provides the user option to turn on/off those apps that are listed. To add apps on startup, check the next step.
How to make certain apps auto-start on bootup?
It is possible to auto-start an app when you switch on the computer every time. To do this, simply follow the following steps:
- Click on the start menu at the bottom left corner of your screen and locate the app shortcut in the start menu.
- Right-click on that app and a small menu appears with one of the options labeled as ‘More’. Bring your mouse pointer on ‘More’ and the menu will extend further towards right displaying other options. Left-click on the option labeled as ‘Open File Location’. A folder will open which contains shortcuts of all the apps installed on your computer. The directory path of that folder would look like this:
C:\ProgramData\Microsoft\Windows\Start Menu\Programs
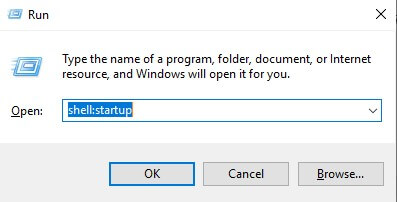
- While the folder is open, press the Windows key with the letter ‘R’ to open the run command box. Type “shell: startup” in the Run box and click on ‘OK’. This will open a new folder window that would be labeled as ‘Startup’. The directory path of the address bar on the top would look like:
C:\Users\AppData\Roaming\Microsoft\Windows\Start Menu\Programs\Startup
- Now that you have two windows open, copy the shortcut of the app from the ‘Open File Location’ window to the ‘Startup’ window.
Once done, restart the computer and you will find that the program shortcut you pasted in the Startup folder will auto-start after a restart. Similarly, you can follow the same steps to remove any program from the list if you don’t want it to start every time you boot your computer.
Advanced System Optimizer
All the above mentioned are guaranteed to work, having tried them personally. However, if you want to use an app to do this for you in an easy manner, then you could always use Advance System Optimizer. It not all maintains your system but can assist to add and remove the start apps.
Advanced System Optimizer fetches all the apps that run at startup. There are options to add, remove and disable them with a few mouse clicks. Apart from setting apps on startup, it is a perfect maintenance tool for computers and includes the following:
System Cleaner: ASO cleans all the junk files and frees up space which makes your PC faster.
Game Optimizer: ASO helps to divert all your computer’s resources to focus on your game. It blocks any notifications which might interrupt your gaming experience.
Driver Updater: Drivers are programs written machine level language that can communicate between the software of your computer i.e. the OS and the hardware. Updated drivers would facilitate flawless communication.
System Protector: It protects your system from Malware, Virus, Trojan, and Spyware attacks.
Disk Optimizer. ASO defragments the hard disk of your computer and organizes the data making it faster to access.
Computers were invented to make things easy. But customizing the computer settings would make easy things easier. Whether setting apps to auto-start at boot or categorizing the apps in the Start Menu, these changes will not only make using the computer easier but make you love your computer even more.


Leave a Reply