When creating a new Gmail account, you may encounter the error message “This phone number cannot be used for verification”. But, that shouldn’t stop you. It could be that you are making a mistake somewhere or you need to take an alternate route.
In this post, we’ll discuss the various reasons leading to the issue. And, most importantly we’ll discuss multiple ways in which you can fix “This phone number cannot be used for verification”.
What Are The Possible Reasons Behind The Issue?
- The phone number you are using is already being used with another account.
- Invalid number format. Choose your country’s international calling code. For example, the international calling code of the US is +1, the international calling code of India is +91, etc.
- Connectivity issues.
- Temporary Outage.
- You reside in a country/ use a telecom provider affected by a recent Google update/ policies.
- Your phone number is flagged for suspicious activities. This could happen if your phone number is linked with multiple Google accounts.
Best Ways To Fix “This Phone Number Cannot Be Used For Verification While Creating Gmail Account”
List of Contents
- What Are The Possible Reasons Behind The Issue?
- Method No.1 – Check Connectivity Issues
- Method No.2 – Wait Till The Problem Is Resolved
- Method No.3 – Check If The Number You Are Using Is Invalid/ Or Already In Use
- Method No.4 – Clear Gmail Cache
- Method No.5 – Skip Phone Verification
- Method No.6 – Contact Google Support
Method No.1 – Check Connectivity Issues
This may sound obvious but the issue can arise when there is no internet connectivity in your area or the connectivity is slow. In either case, you can wait till you get proper connectivity.
Method No.2 – Wait Till The Problem Is Resolved
Many users have reported that they waited till the issue was resolved. And, it actually did. After a few days, they were able to create a Gmail account and verify it without a hiccup. So, it could just be a temporary issue on Google’s end.
Method No.3 – Check If The Number You Are Using Is Invalid/ Or Already In Use
Let’s assume that the number you are trying to use for Gmail account verification is discontinued or is already being used for another Gmail account. If you are sure that the problem persists with one particular number, here’s how you can remove it from one account –
Step 1 – Log in to an account that has multiple active phone numbers. Type https://account.google.com/ in the address bar and press Enter.
Step 2 – Click on the Personal info tab.
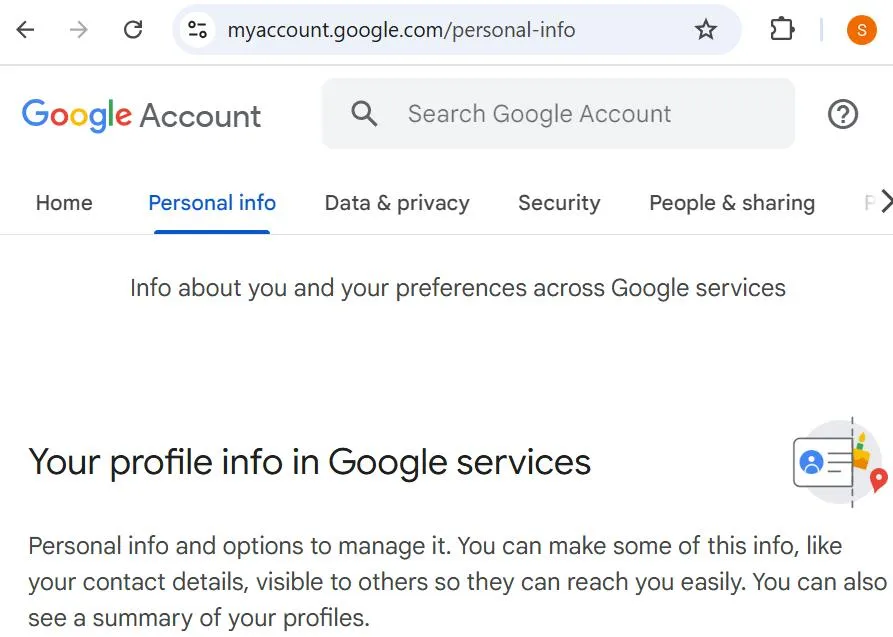
Step 3 – Scroll down, under Contact info, and click on Phone.
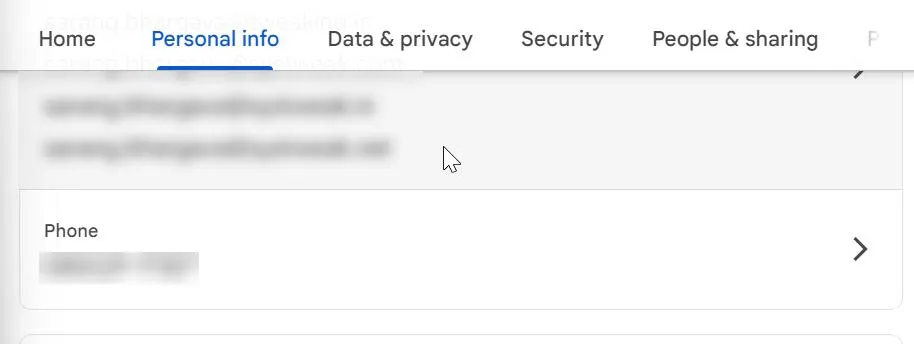
Step 4 – Locate the phone number that is creating issues in another Gmail account’s verification. Click on the arrow key next to it. Click on the bin icon to delete the number
Go back and use the number for Gmail verification and to get rid of the “This phone number can not be used for verification” error message.
In case, an inactive phone number is the problem, use an active phone number for Gmail phone verification. But, if the issue occurred because the same phone number was used in another Gmail account, you can use the above-mentioned steps to delete the phone number from one account and use it in another account.
Method No.4 – Clear Gmail Cache
A corrupt app cache can also be the reason why you are facing errors. So, if you are facing the aforesaid error on an Android or an iPhone device, you can consider clearing the Gmail cache.
To Clear Gmail Cache on Android
Step 1 – Go to Settings and search for Apps in the search bar.
Step 2 – When the Apps open, locate Gmail and tap on it.
Step 3 – Tap on Storage & cache.
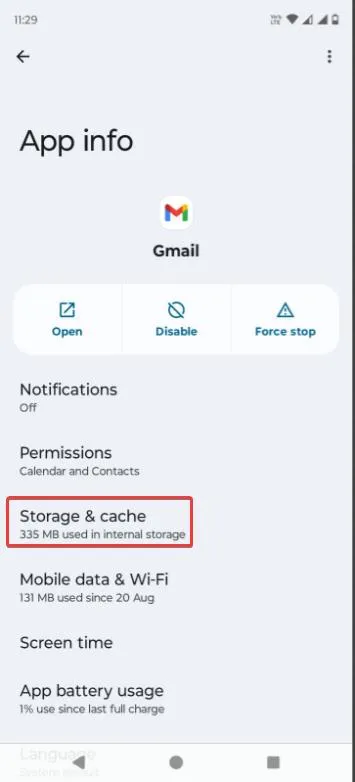
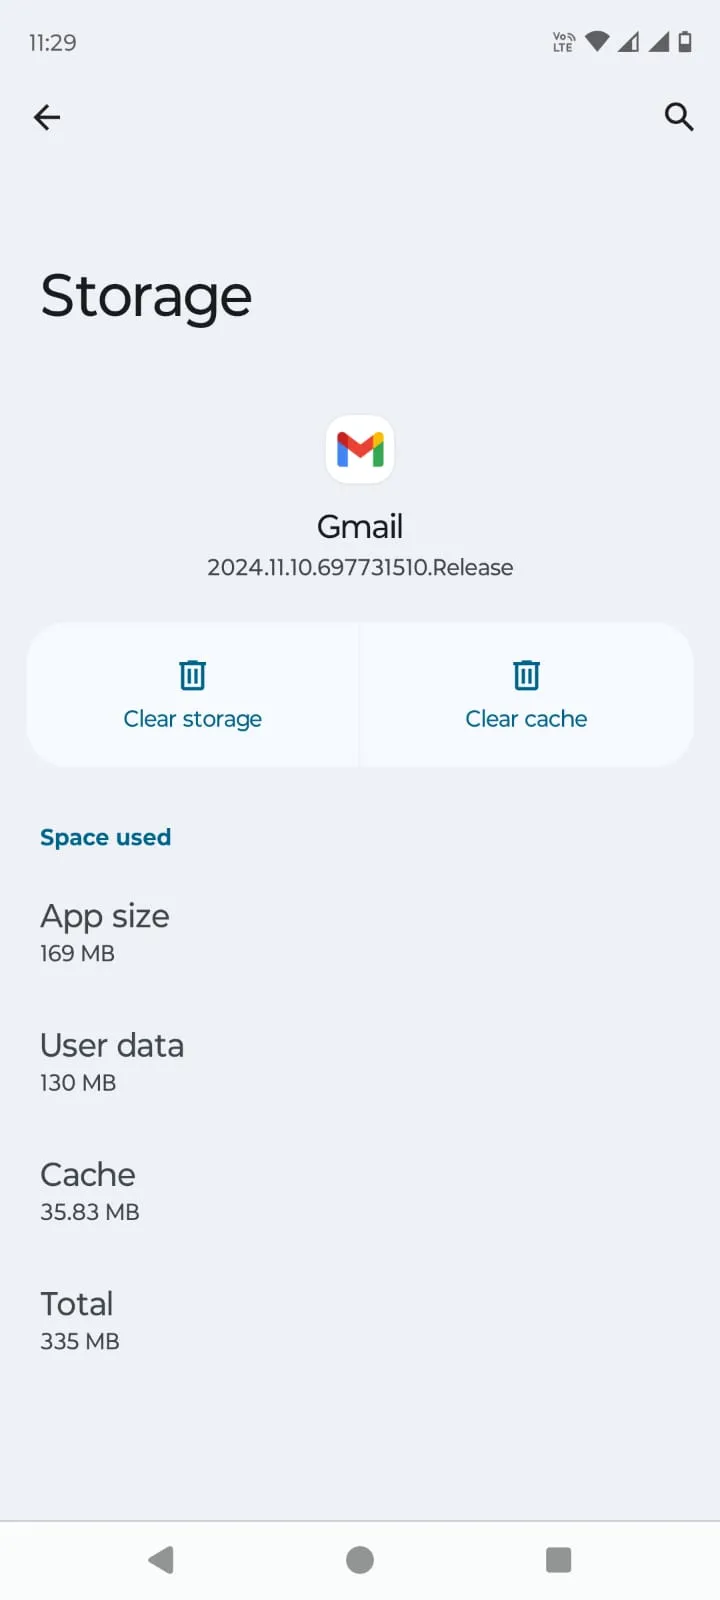
Step 4 – Tap on Clear Cache.
To Clear Gmail Cache on iPhone
Step 1 – Open Settings.
Step 2 – Tap on General.
Step 3 – Tap on iPhone Storage.
Step 4 – Select the app whose cache you want to clear.
Step 5 – Tap on Offload App.
Once you have cleared the Gmail cache on either Android or iPhone, retry Gmail phone verification to check if the problem still persists or not. If it does, move to the next step. Here are some other ways you can free up iPhone storage.
Method No.5 – Skip Phone Verification
When creating a Gmail account you can try and skip the Gmail phone verification all together. But, it is important that you provide your gender and birthday. To do this, follow the steps mentioned below –
Step 1 – Head to www.gmail.com
Step 2 – Click on Create account.
Step 3 – Follow the steps, and skip the step that asks you to enter the phone number.
Step 4 – Agree to Google’s Terms of Service and Privacy Policy.
Method No.6 – Contact Google Support
If the problem still persists, you can take a screenshot of the error message and email it to Google Support for any further assistance.
Creating a Gmail Account Should Be A Smooth Process
Creating a Gmail account can be a sign that you are embarking on a new journey. It could be that you are making a new Gmail account for the work that you are passionate about. Or, maybe you want to create a YouTube channel to make videos. Whatever might be the reasons, errors can prove to be a big boulder. And, we hope we have crushed them. Didn’t we? Do let us know in the comments section below. For more such content, keep reading Tweak Library.


Leave a Reply