Let’s assume you have some critical presentation files on a Mac that has hung up on you. How would you access files on this damaged machine? Thankfully you have a friend’s Mac available. But, the question is how can you access this damaged Mac from another Mac. Out of a variety of boot modes, you can use Mac’s Target Disk Mode and transfer files. In this blog, we’ll guide you through all the various steps for using Target Disk Mode on Mac.
What is Target Disk Mode on Macbook?
As the name suggests, Target Disk Mode is a boot mode in Mac where you can use your Target Mac as an external hard drive on your host Mac. After you have established the connection between the target and the host Mac, you can easily access files that are present on your Target Mac’s startup disk.
Stay with us till the last, so that you know when the Target Disk Mode or TDM can prove to be handy for you. But, if you are stuck in a soup and want to get out of it quickly, you can simply refer to the guide.
How To Boot Mac in Target Disk Mode?
Don’t worry, if you have a Mac that is powered with the latest Silicon M1 Chip, we’ll cover steps for that as well –
Prerequisites –
1. Connect Two Macs
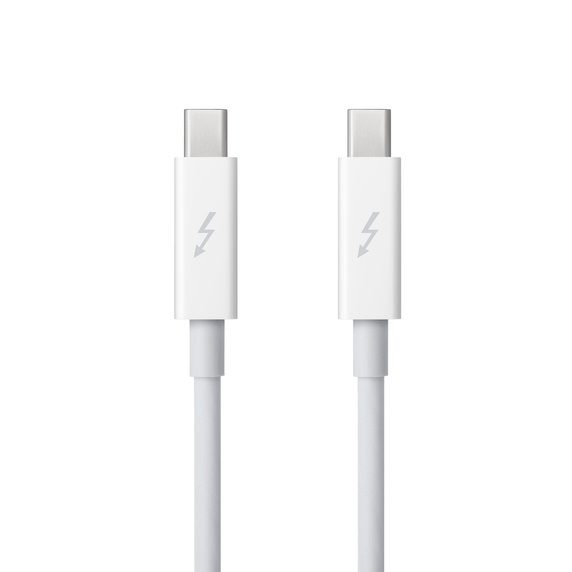
Use a relevant FireWire port or Thunderbolt and connect both the machines. Here one Mac will take the role of the “target” i.e. the machine from which the files will be transferred and the other Mac will take the role of “host” and here all the files will be transferred. Also, you need to make sure that you have the charger for both the Macs so that they don’t run out of power.
2. Boot Target Mac in Target Disk Mode
We’ll assess both the situation – whether your target Mac is turning on or not.
- For Intel-based Mac
Here we are presuming that your target Mac is at least turning on –
1. Connect both the Macs using a Thunderbolt cable
2. Then, click on the Apple logo and follow this path –
System Preferences > Startup Disk > Target Disk Mode
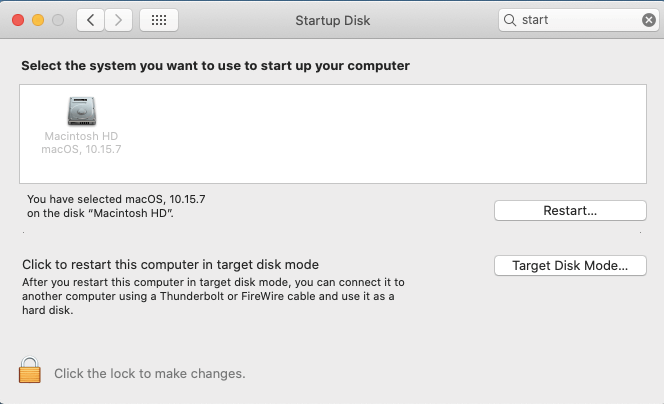
Now your Mac will start in the Target Disk Mode.
Let’s consider a scenario when your Mac won’t turn on. Needn’t panic –
1. Force your Mac to shut down by holding the power button and then long-pressing T till your Mac reboots
2. Once you see the Thunderbolt icon on the screen, you can leave the key. This indicates that now your Mac is in Target Disk Mode. Wait for a little while
3. Soon, your host Mac will detect your target Mac, and you will be able to use it as an external drive for accessing and transferring files
4. You can now copy or transfer files from target to host Mac
- For Silicon M1 Chip Powered Macs
1. Connect M1 powered Mac with another host Mac using a Thunderbolt cable
2. Shut down your M1 Mac and then, hold the power button till you see the Loading startup options on your screen
3. Click on the options and enter the password
4. On your host, Mac click Finder > Locations > Network
5. In your second Mac’s network window, double-click on the M1 Mac that is sharing volume or disk
6. Click on Connect As and select Guest
7. Click on Connect
Situations Where You Will Need Target Disk Mode on Mac –
- A damaged Mac can give you jitters especially if there are critical files that you want to access – come in Target Disk Mode. If you have another Mac available, you can use this mode and use your damaged Mac as an external hard drive
- Why let a USB volume act as a middleman between two Macs? You can instead use Target Disk Mode to directly transfer files from one Mac to another
- Purchased a brand new M1 Mac and want to transfer data from your old Mac
When Will Target Disk Mode On Mac Not Work and What Can Be Done Then?
- In case your drive is non-operational or faulty, the Target Disk Mode on Mac won’t work
- Your hard drive is not in the correct format
- Target Disk Mode on Mac won’t operate if you are using a faulty or buggy Thunderbolt cable or FireWire cable
- There are some probable hard drive issues
In situations like these, if Target Disk Mode is not working on Mac and you want to recover data, you can use data recovery software for Mac.
Best Fixes To Resolve Target Disk Mode On Mac Not Working
If you are facing any of the scenarios mentioned above, learn these effective methods to fix the “Target Disk Mode” not responding or working issues on Mac.
- Update macOS to the latest version.
- Check ports & cables and replace them (if required).
- Adjust Finder Preferences.
- Turn off the Firewall password.
- Disable FileVault encryption.
- Reformat your Mac.
- Use an external hard drive as a target Mac.
If you’re still struggling and Target Disk mode is still not working on your Mac, you might be searching for different ways to recover your precious files. If there’s an urgency, I recommend you use reliable data recovery software for Mac. Using these effective utilities, you can run a comprehensive scan and get back all your photos, videos, documents, archives, and other multimedia files in no time.
I’ve been personally using iMyFone D-Back Hard Drive Recovery Expert to rescue all my lost and accidentally deleted files stored in Mac hard drives, USB Flash Drives, SD Cards, and other storage devices. The application supports more than 1000 file types and formats. Hence, you can quickly restore all your data in one go. Besides this, you can also recover Mac partitions, including the RAW, Formatted, and corrupted ones as well.
How To Recover Deleted Files on Mac using iMyFone D-Back Hard Drive Recovery Expert?
D-Back Hard Drive Recovery Expert is a phenomenal tool that is designed with the sole aim to recover almost all types of files, no matter how they’re deleted in the first place. Keep reading to know how it works:
STEP 1 = Download & install the latest version on D-Back Hard Drive Recovery.

STEP 2 = Select the location from which you want to recover data.
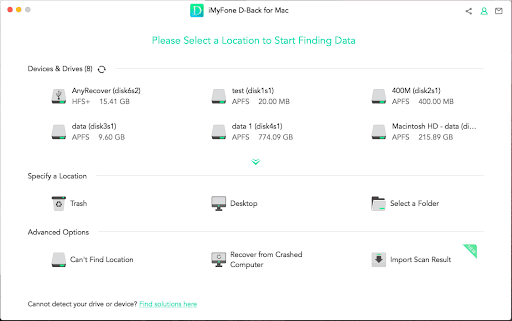
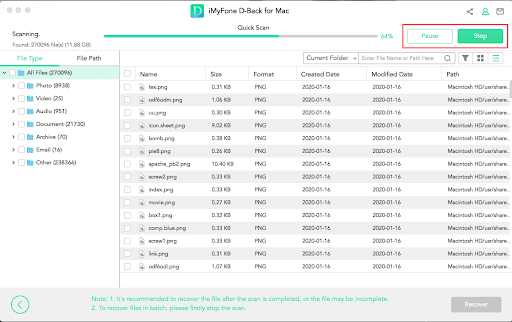
You can pause, stop and resume the scanning process at your convenience to recover data.
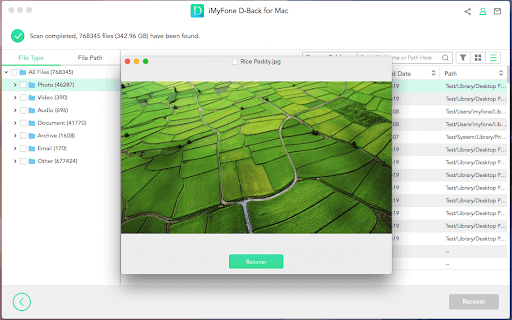
STEP 3 = As soon as the scanning process gets completed, all your missing, erased, and lost files will be neatly listed. You can preview the files and restore them selectively.

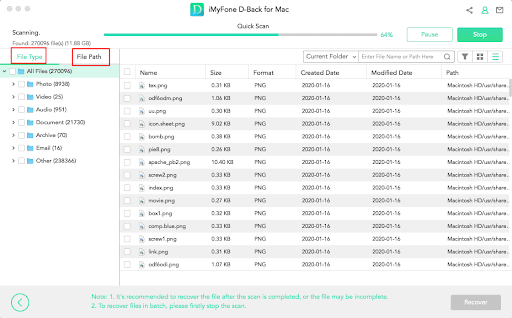
You can toggle between the File Type and File Path to quickly find the missing files you need. Choose the location to save your recovered files effortlessly.
STEP 4 = Preview the files you wish to restore and hit the “Recover” button.
Make sure you do not save the recovered files to the location from where you’ve lost all the data in the first place.
Wrapping Up
We hope that you will now be able to use Target Disk Mode on Mac, should the need arise. For more such content, keep reading Tweak Library. You can also find us on Facebook, Twitter, Instagram, Pinterest, Flipboard, and Tumblr. Like tech videos, you can subscribe to our YouTube channel.


Leave a Reply