When you click on the Start button, you can see a Power button at the bottom right-hand side of the screen. This button lets you shut down or lock your computer, put it to sleep, update, and restart it. As smooth as it may sound, many users have complained that the power button is not working on their PC.
Here’s a real incident that a user faced –
I wanted to shut my PC down. So, I pressed the Windows key (The Start button) and clicked on the Power button. It animated when I clicked on it but after that, I couldn’t do anything else. Please help.
If that’s you, we are here to help. Here are some of the steps you can undertake if the Power button is not functioning on your Windows 11/10 PC.
Stay till the end, as we have a solution that can work like magic and fix a variety of common PC-related issues like the one at hand.
Best Ways To Fix Windows Power Button Not Working
Solution No.1 – Use The Quick Links Menu
Press Windows + X which will fire up the Quick Link menu. The same can also be accessed by right-clicking on the Windows button. Here click on the arrow key next to the second last option i.e. Shut down or sign out. Now, you’ll be able to see all the options that you would otherwise when you click on the Power button.
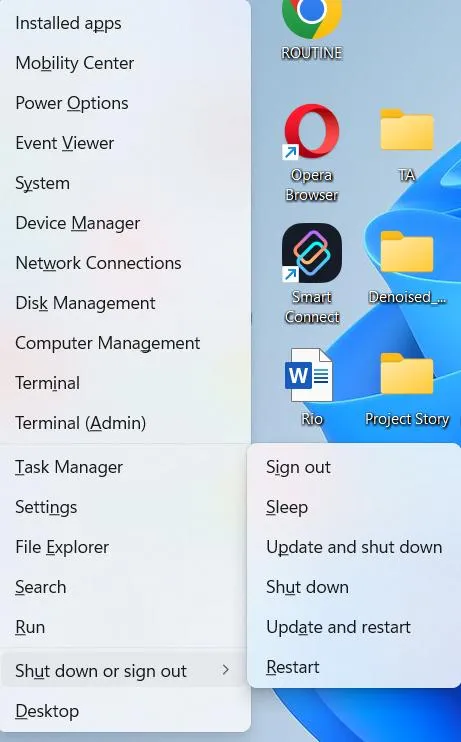
Tip – From the Quick Link menu, select Restart. That’s because restarting helps fix the temporary system glitches that are known to cause problems like the Power button not working.
Solution No.2 – Restart Windows Explorer and Start Menu Process
If the dedicated Power icon on your Windows PC is not working, it could be a glitch with either process – The Windows Explorer, or the Start Menu. A probable way to fix the issue is to restart either process. To do that –
Step 1 – Open the Task Manager by pressing Shift + Ctrl + Esc
Step 2 – Locate Windows Explorer, right-click on it, and select Restart.
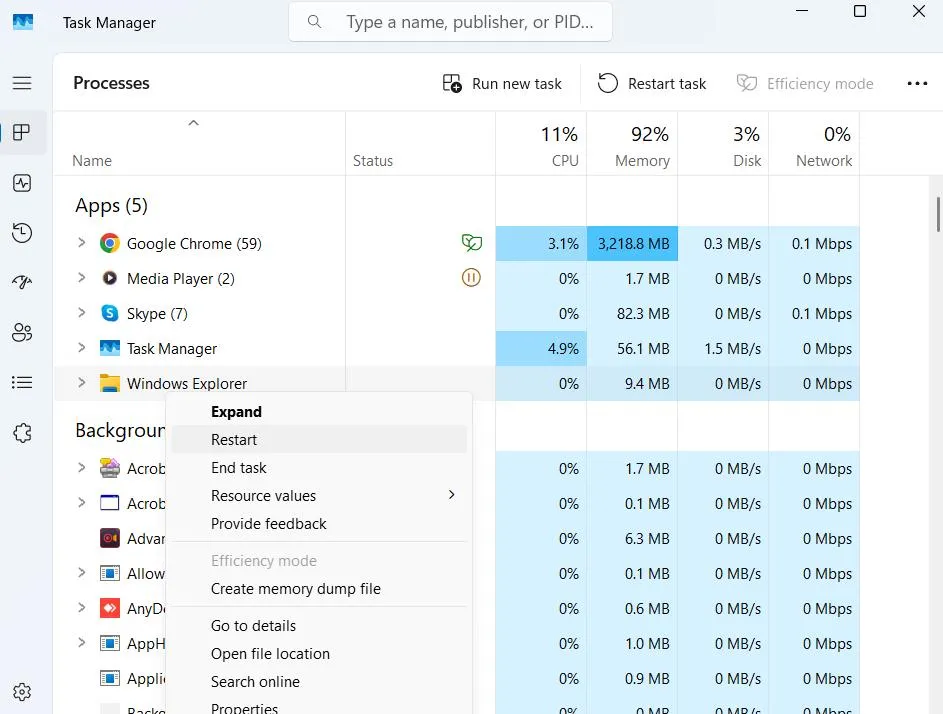
Step 3 – Next, in the search bar, type and search for Start. Right-click on it and select End Task.
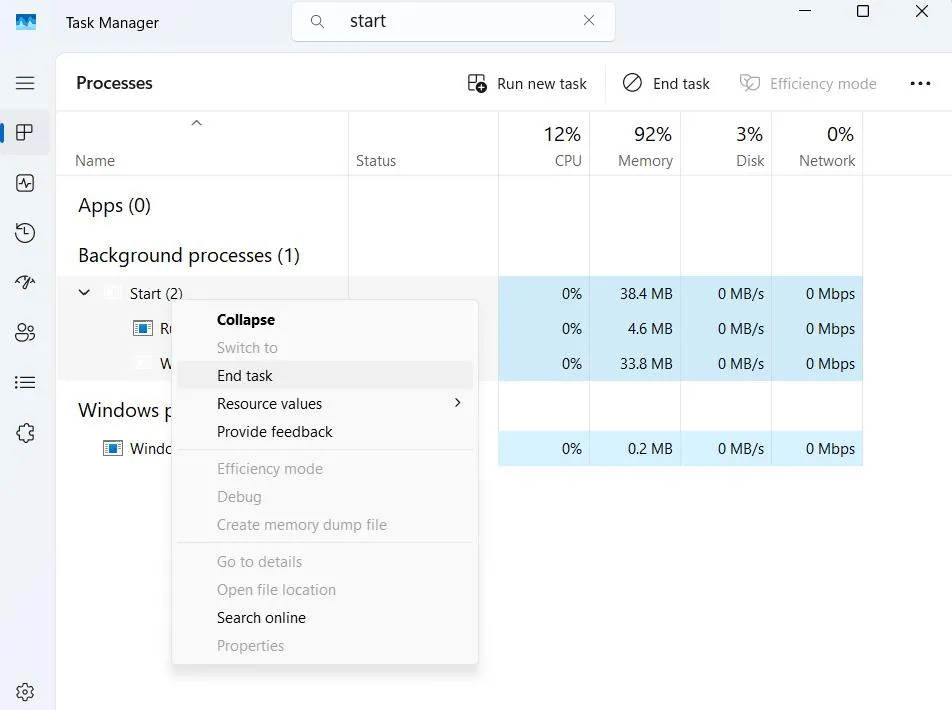
Step 4 – Reboot your computer and check if the issue is fixed.
Solution No.3 – Restore the Default Power Plan
Here’s another version of the issue –
Some users have reported that when they click on the Power icon, they get There are currently no power options available. A possible solution to fix this is to restore the default power plan (especially, if you or someone has edited it). To do that –
Step 1 – In the Windows search bar type Cmd and click on Run as administrator from the right-hand side.
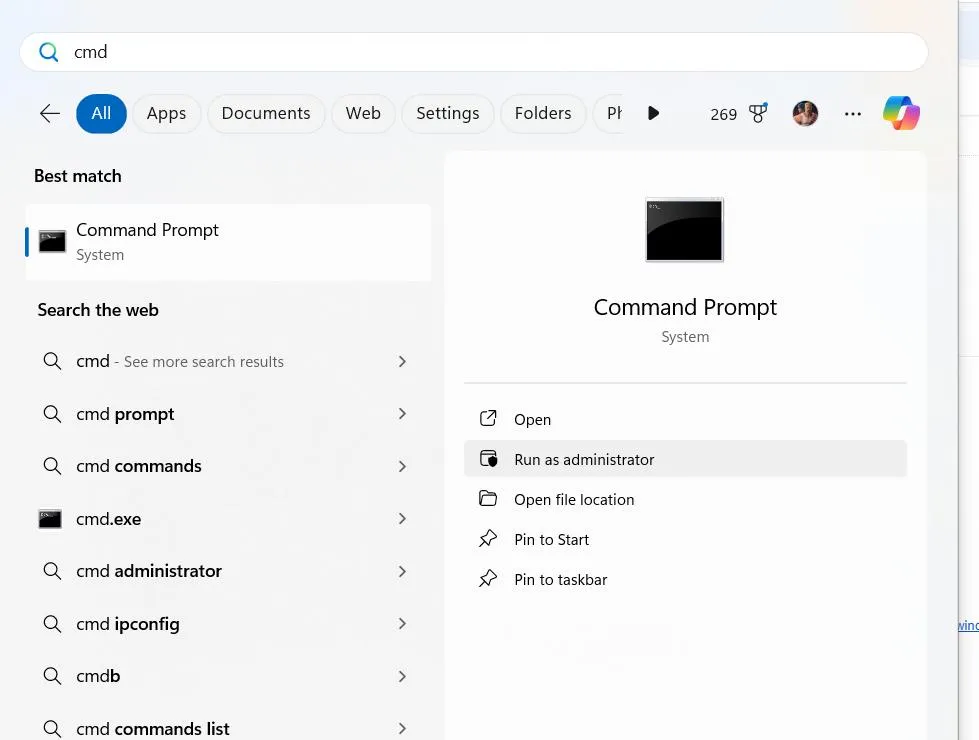
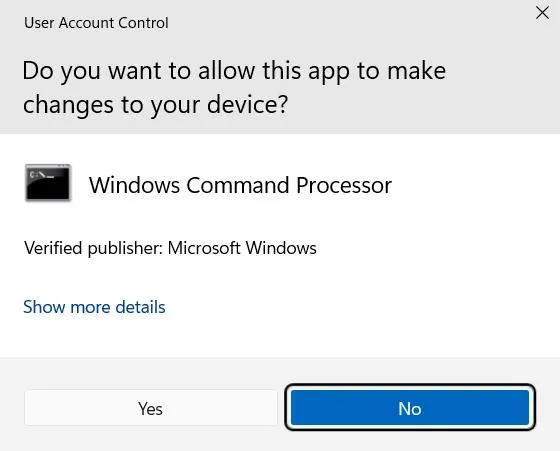
Step 2 – When the UAC (User Account Control) prompt appears, click on Yes. This will open the Administrative Command Prompt.
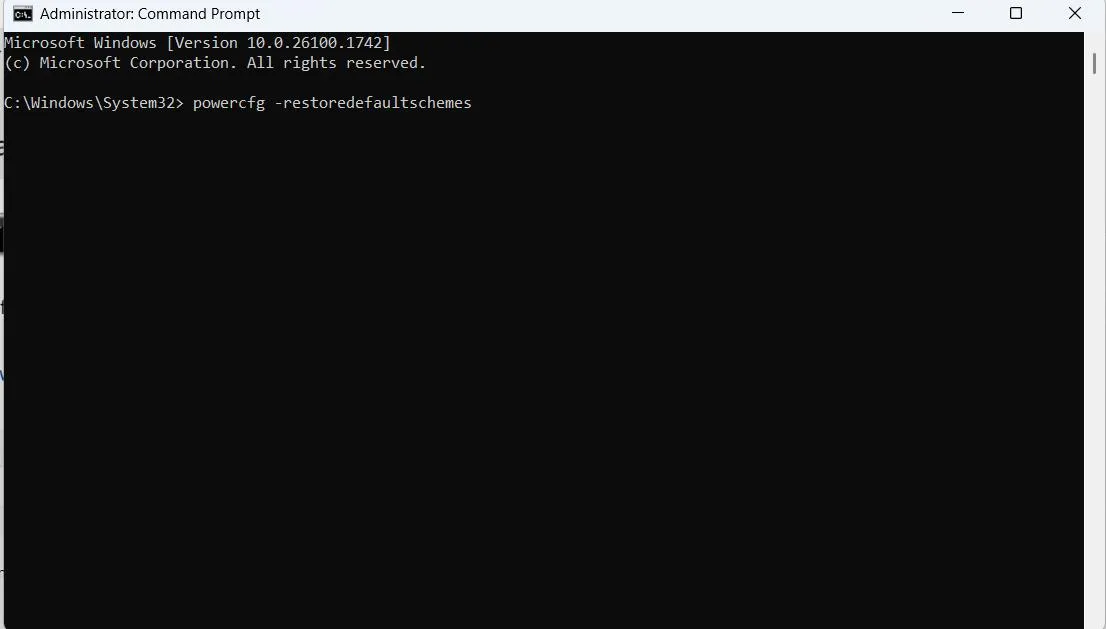
Step 3- When the Command Prompt opens, type powercfg -restoredefaultschemes and press Enter.
Step 4 – Restart the computer.
Check, if you can access all the options that appear when you click on the Power button.
Scan for Corrupt System Files
Corrupt system files could be the reason why the Power button is not working on your PC. A simple way to fix corrupt system files is to run the SFC command in the Administrative Command Prompt. To do that –
Step 1 – Open the Administrative Command Prompt as shown above.
Step 2 – Type sfc /scannow and press Enter. Wait for the process to complete.
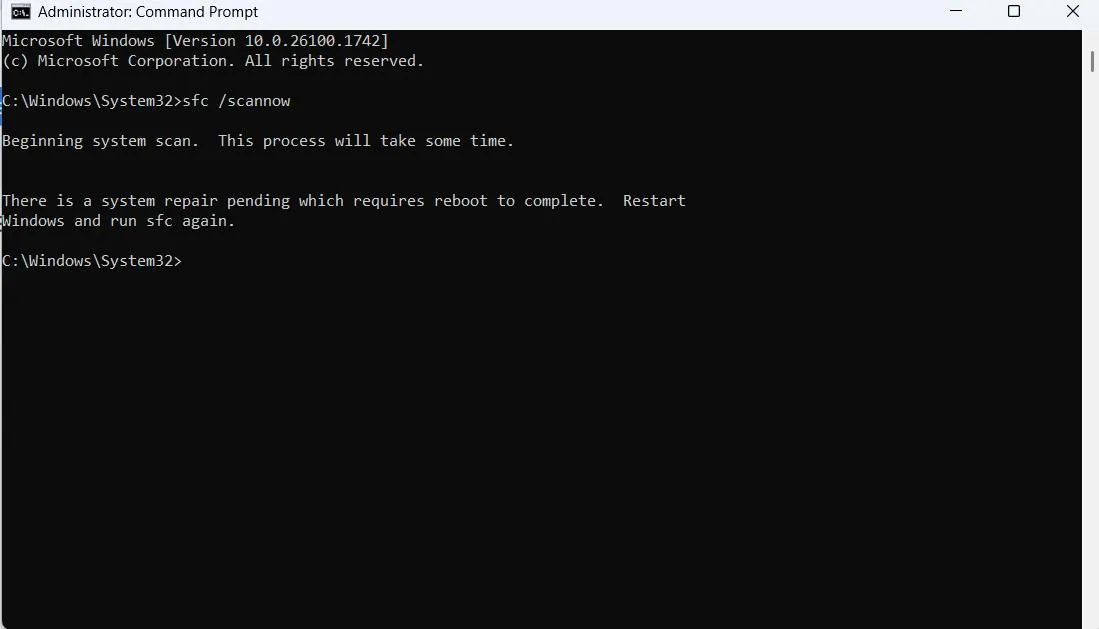
Once the process completes, restart your computer and check if the issue is fixed or not.
Solution No.4 – Fix The Start Menu
As we mentioned earlier, the Power button occurs when we press the Windows button, which further opens the Start Menu. But, what if there are issues with the Start menu itself? Here are some of the best fixes to resolve issues with the Start menu.
Solution No.5 – Delete The Shell Folder
The Shell folder contains the layout of the system. If it’s corrupted, you can run into issues like the Power icon not functioning. To fix it, you can delete the complete folder. Worry not! Because once you delete the folder, Windows creates a new one automatically. Here’s how you can reach the folder and delete it –
Step 1 – Open the File Explorer.
Step 2 – Click on View > Show > Hidden items.
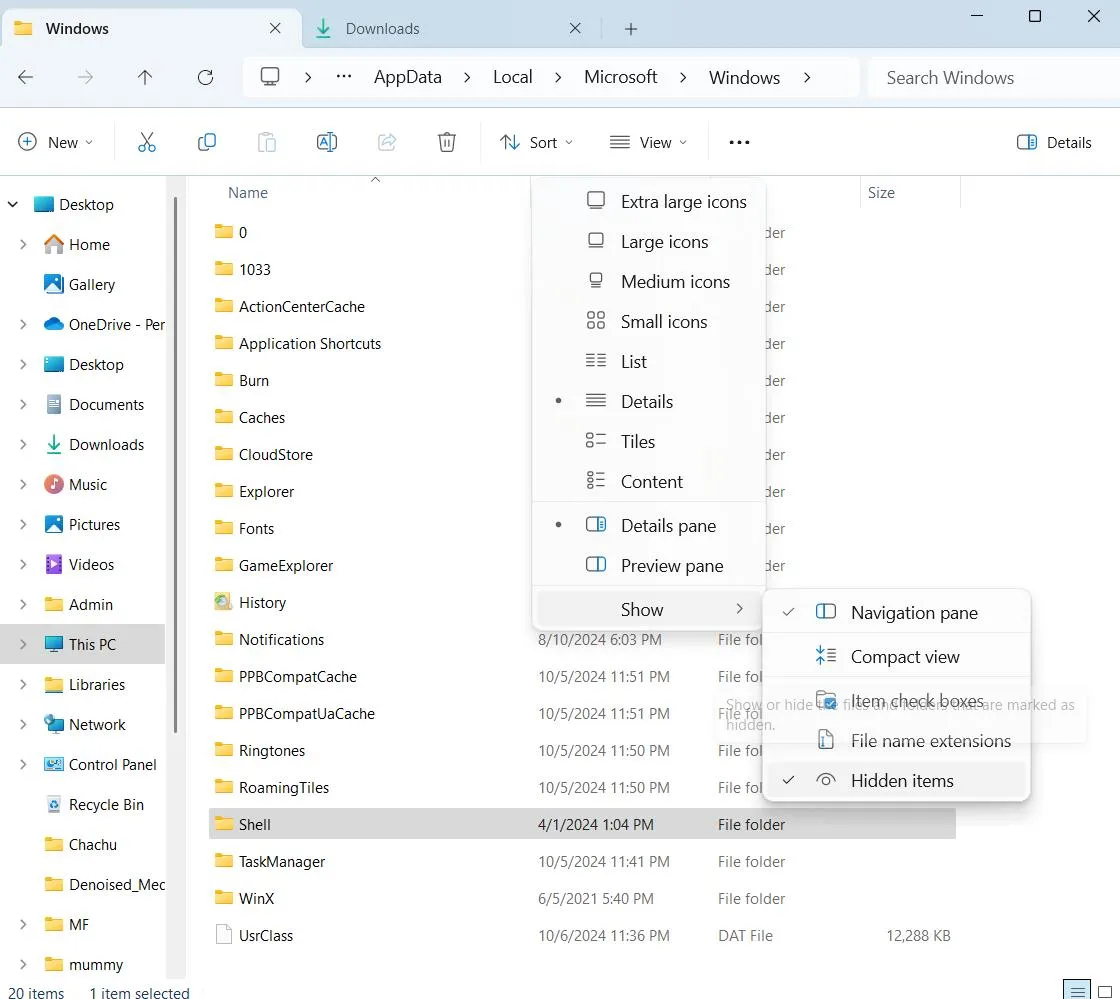
Step 3 – Navigate to this path –
C:\Users\Admin\AppData\Local\Microsoft\Windows
Please note – Here you can replace the Admin with the user name.
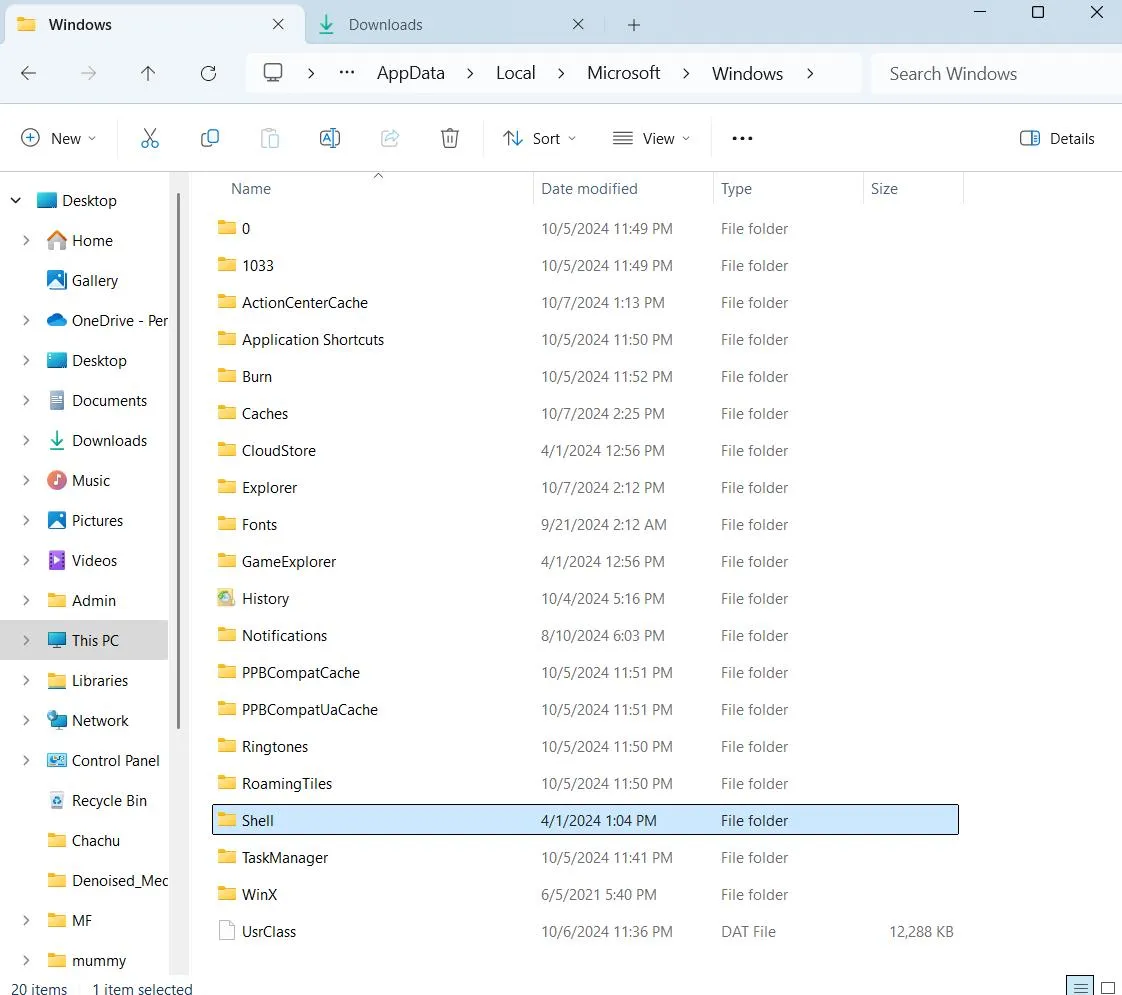
Step 4 – Locate the Shell folder and delete it.
Step 5 – Reboot your PC.
Once it restarts, check if you can access the Power button in a hassle-free manner.
Solution No.6 – Use A System Restore Point
If you have already created a System Restore point, you can revert to a point when your Windows computer was functioning properly.
Writer’s Tip
As promised here is a tool that can work like a charm and fix common PC-related issues – Advanced System Optimizer.
You may be wondering, how can Advanced System Optimizer help me if the Power icon on my computer is not working? With a few simple clicks, Advanced System Optimizer can help fix the issues that could be the reason behind the problem at hand.
For instance, it can help you get rid of corrupt system files or any redundant background processes that are interfering with the functionality of your Windows PC.
Let’s have a look at a demonstration of how Advanced System Optimizer can help you fix common issues on your computer.
Step 1 – Download Advanced System Optimizer, and run the installation file.
Step 2 – Click on Smart PC Care from the left-hand side.
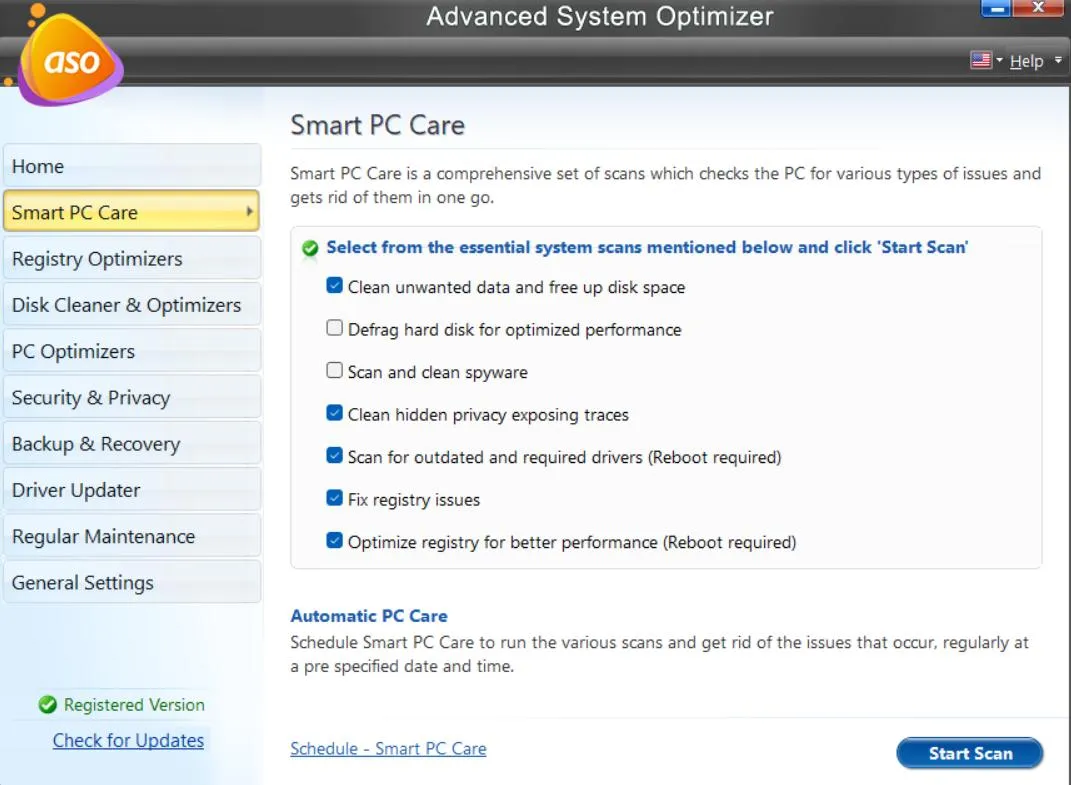
Step 3 – From the right-hand side, click on the Start Scan button from the bottom right-hand side.
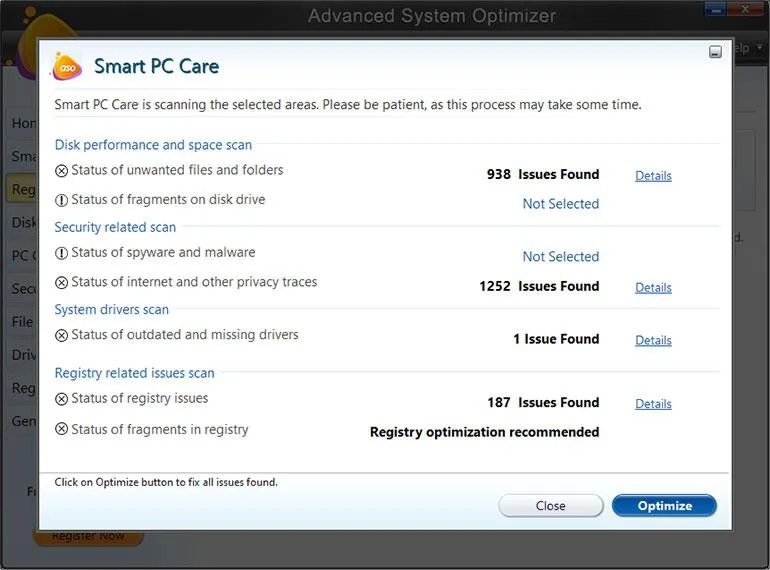
Step 4 – Once the scan is over, click on the Optimize button.
Now check, if you have been able to fix the issue. To know more about this wonderful tool, check out our comprehensive review of Advanced System Optimizer.
Is Your Issue Fixed?
Can you now click on the Power icon and access all the menu options without any problems? If yes, which of the above solutions helped you out? Please let us know in the comments section below.
Apart from that, we’d again like to reinstate that if you often have to deal with computer-related issues, you can always take the aid of a cleaning and optimization tool. For more such content, keep reading Tweak Library.


Leave a Reply