Taking screenshots on a Mac is an easy task except that sometimes it doesn’t work as expected. A screenshot helps whenever you need to capture a work detail, crop a scene from a video, or to share something interesting with others.
However, what about when you face this ‘screenshot on Mac not working’ problem? Annoying right, especially for those whose work revolves around taking plenty of images? But don’t worry, this is a common issue among Mac users.
In this guide, we will see the reasons why screenshots are not working on Mac and detailed troubleshooting steps so that you can take screenshots in no time. Let’s dive in!
How to Fix MacBook Screenshot Not Working?
If the screenshot functionality isn’t working as it should, there can be several possible reasons. It could be a hardware problem, a little software bug, or even a straightforward setup error.
Let’s examine a few possible reasons and how to fix them:
1. Verify your Shortcut Settings
Incorrect shortcut settings are one of the most common causes of screenshot issues on MacBooks. Here is a quick look at the most common keyboard shortcuts for taking screenshots on MacBooks-
- Command + Shift + 3 – This captures the whole screen.
- Command + Shift + 4 – This helps in capturing a specific area on the screen.
If you or someone mistakenly changed these shortcuts, verify the same. To do this open the System Preferences from the Dock and click on Keyboard then choose Shortcuts.
2. Restart Your Mac
Often, a straightforward restart can resolve numerous problems, such as the “Mac screen capture not working” problem.
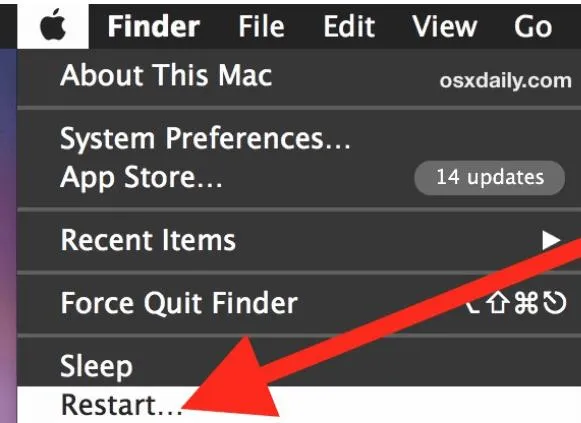
Restarting fixes any temporary bugs and reboots your Mac, which can be the reason you are facing this screenshots not working issue. Try it out and see if it resolves the issue. Here’s what to do:

Step 1: Click on the Apple icon from the top-left corner of the screen.
Step 2: Then click on the Restart option from the drop-down menu.
Once it restarts, then try taking screenshots with the shortcuts mentioned in method no 1.
Read Also: How to Create a Folder on a Mac?
3. Reset NVRAM
Occasionally, problems with essential Mac applications can be fixed by resetting the NVRAM. Resetting NVRAM can help resolve system-related problems that may be keeping screenshots from functioning. Here’s how to reset the NVRAM:
Step 1: Click on the Apple icon from the top-left corner of the screen and choose Shut Down from the drop-down menu.
Step 2: Now press the Power button, and at the same time press the Option + Command + P + R keys together.
Step 3: Now when you see the Apple Logo or hear the startup sound, release the keys.
4. Verify Your Dropbox Settings
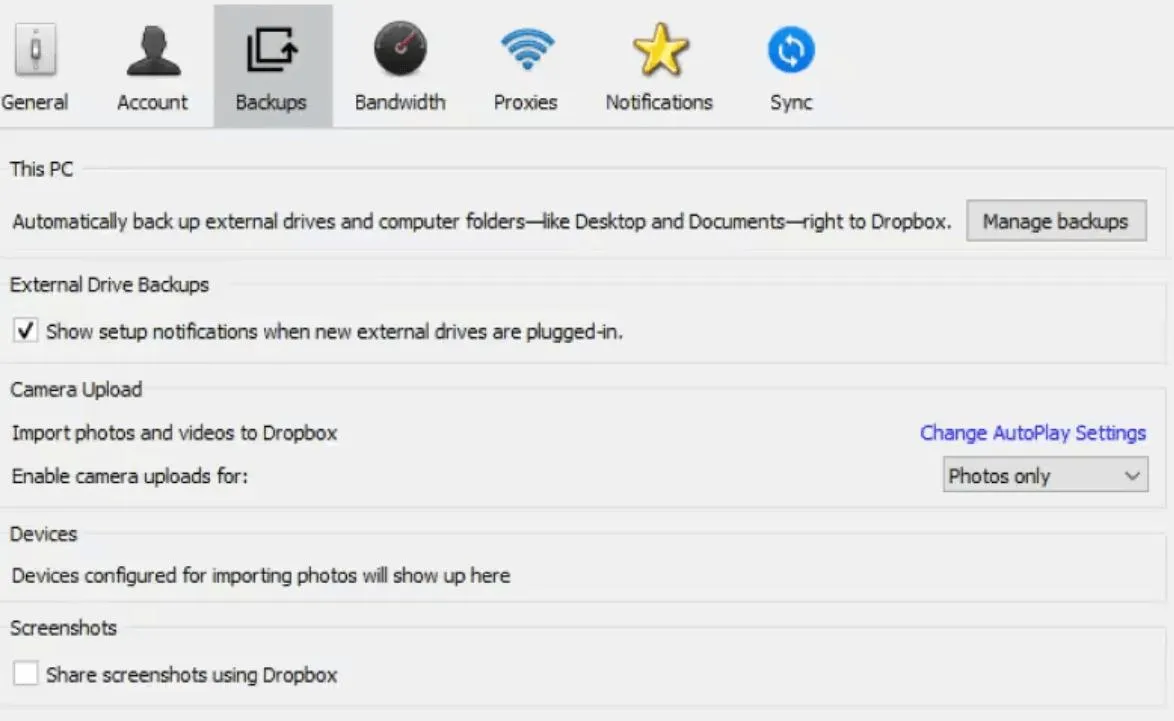
If you are using Dropbox as a cloud storage solution on your Mac then, ensure that the screenshots you take get uploaded to Dropbox instead of going to your desktop window.
To do this follow the steps below:
Step 1: Open the Dropbox application on your Mac.
Step 2: Click on Backups.
Step 3: Ensure that the box of ‘Share screenshots using desktop’ is selected.

Read Also: How to Turn Off Mouse Acceleration on a Mac?
5. Set The Saving Location of Screenshots
Whenever you capture a screenshot on your Mac, it automatically saves it to the desktop for easy file access. On the other hand, the screenshot files will no longer be available on your desktop if you unintentionally alter the location.
However, this does not imply that the screenshot isn’t functional on Mac. Here’s how to locate where screenshots are saved:

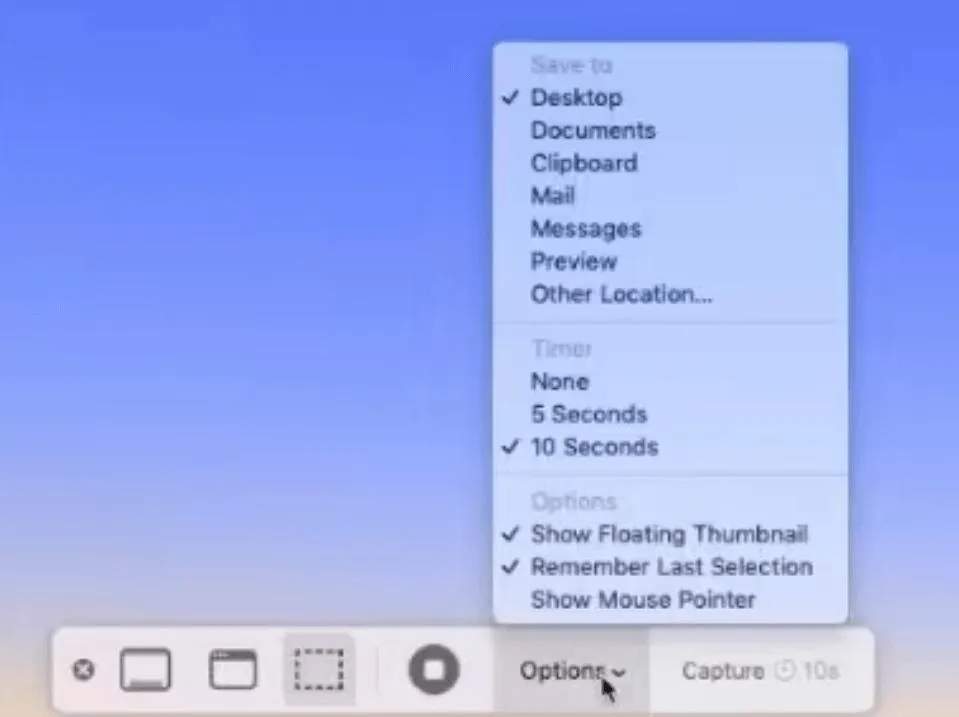
Step 1: Press the Command + Shift + 5 keys together.
Step 2: A bar will appear at the bottom of your screen, from that click on the Options.
Step 3: Click on it and verify the location of your saved screenshots is selected as Desktop.
Read Also: How to Reset Network Settings on a Mac?
Screenshots on Mac Not Working? It’s Fixed
Stumbling upon the ‘screenshot on Mac not working’ problem can be quite annoying especially when you are in a hurry to take some snaps. But with the solutions provided in this guide, you should be able to resolve the issue efficiently.
Make sure to look up the keyboard shortcuts, restart your Mac, reset NVRAM, or use a third-party application when it becomes necessary. If the issue persists, it is wise to contact Apple Support for additional help.


Leave a Reply