What is CPU?
Those who are computer geeks may be aware of what is CPU however for those who don’t know what CPU is, let me give you a brief idea about it.
(CPU) also known as the central processing unit is the brain of the computer which performs most of the processing tasks inside a computer. To control and process instructions and data flow, the CPU relies severely on the chip set, which is an assembly of microchips placed on the motherboard.
The CPU has two major components:
Control Unit: Extracts instructions from memory and decodes and executes them
Arithmetic Logic Unit (ALU): Handles arithmetic and logical operations
The CPU relies on the system clock, secondary storage, memory, data and address buses to function properly.
What are CPU Coolers?
A CPU cooler is a device which looks like a mini fan, is designed to pull out heat away from the system CPU and other components in the unit. Earlier computers used to come with only one CPU Cooler however nowadays, Cabinets comes with 2-3 CPU Coolers installed for swift performance. Using a CPU cooler to lower down CPU temperature improves the productivity and stability of the system. Adding a CPU cooler can increase the overall noise level of the system.
We have 2 options to use maximum CPU Power in Windows 10.
2. Automatic Advance Settings – Advanced System Optimizer
CPU settings for Maximum CPU Power Usage in Windows 10
For power-hungry applications and processes, Windows 10 has an option to max out your CPU usage. It’s not an ideal way to run your computer with these settings as it produces a lot of extra heat but can give you maximum CPU power usage for brief periods of high demand usage. Whenever you need to perform a heavy task on the system, you can increase CPU speed and once the task is over, you can set it back to normal.

Let’s get to know how to do this.
Step 1. Press Win + R key to open Run Dialogue box -> type in ‘control’ and press enter.

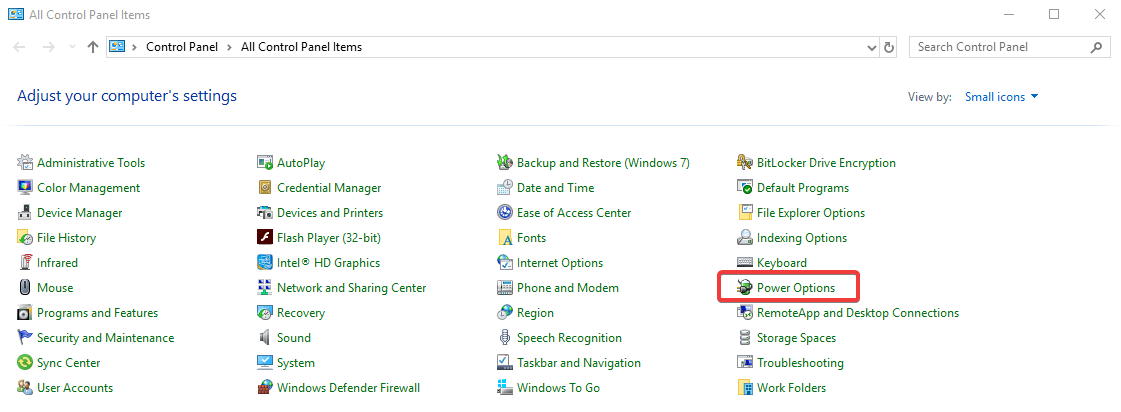
Step 2. Under control panel, go to ‘Power Options’ -> click on ‘Change Plan Settings’.

Step 3. On this screen, we need to click on ‘Change Advanced Power Settings’.

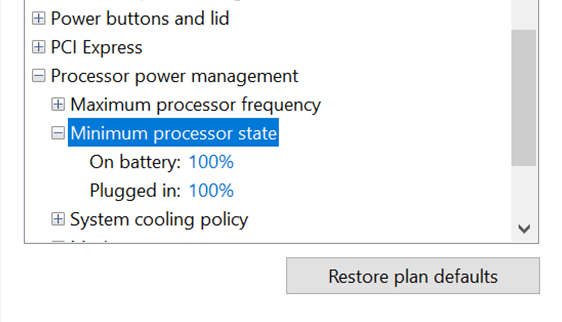
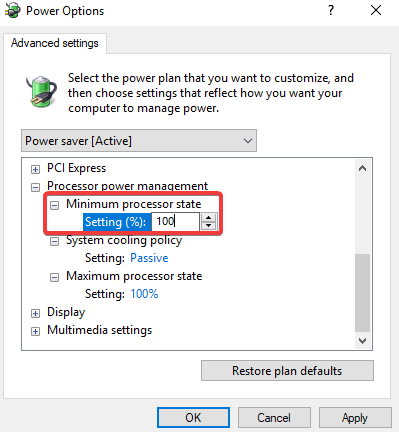
The next window will show you advanced power setting options. Here we need to scroll down to ‘Processor Power Management’ options and expand the list.

Step 4. Over here we need to set the ‘Minimum Processor State’ and ‘Maximum Processor State’ to 100% to increase CPU speed and Save the settings by clicking on Apply and Ok.
Still Facing Performance Issues?
Advanced System Optimizer is one of the most powerful cleaning and optimization software for Windows 10 / 8.1 / 8 / 7 / Vista and XP. It offers an all-round maintenance and security suite for your computer.
Key Features
- Performs optimization to allow maximum usage of system resources, and fewer system crashes.
- Advanced System Optimizer speeds up system performance and CPU usage.
- Game Optimizer turns your computer into a dedicated gaming machine by stalling annoyances.
- Driver Updater feature finds the latest system & device drivers for you and installs them effortlessly.
- System Protector ensures 24/7 malware security by monitoring your computer’s activity.
- Disk Optimizer feature performs regular disk maintenance by performing disk defragmentation on the system.
Conclusion
By performing the above steps, you can easily use maximum CPU power in Windows 10 and enable your power-hungry applications to work effortlessly without adding additional hardware. Try out Advanced System Optimizer to keep your system optimized and ensure that your system is clean, secured, updated and optimized to give its 100% for best computing experience.


Leave a Reply