There could be hardware problems with the wireless keyboard or how the Windows system configures it if it doesn’t work on Windows. Hardware issues could range from a stuck key to a faulty keyboard circuit board.
Typically, issues emerge when a wireless keyboard encounters significant lag or stops functioning properly on Windows. These issues occur across different wireless keyboard and system models and manufacturers. If your wireless keyboard isn’t working, this article will guide you through troubleshooting steps to fix it.
How Do You Diagnose Wireless Keyboard Not Working?
Did you want to understand why the keyboard is not working? Many things could go wrong with a wireless keyboard, but these are probably the most important ones:
- Optimal System Boot Time:
Using the Fast Startup feature to boot the system might cause a wireless keyboard not to work if it doesn’t have the resources that the wireless keyboard needs.
- Application in Conflict:
Input module issues could result from an application (such as an anti-keylogger) blocking the keyboard from registering keystrokes on your computer.
- Wireless Keyboard Driver or Utility Error:
If the OEM wireless utility or the driver installation is corrupt, the keyboard modules may not be able to run, leading to the wireless keyboard issue.
- Deprecated Wireless Keyboard Software:
Incompatible firmware with newer operating system modules can prevent your wireless keyboard from working properly.
Troubleshooting Your Wireless Keyboard:
Ensure you have replaced new batteries and there is no issue with the power. If you’re still having trouble with your wireless keyboard, try these solutions:
Method 1: Resynchronization
One of the best methods is to resynchronize the connection between your keyboard and receiver. Re-establishing the connection of your keyboard typically resolves the problem. To get your keyboard and receiver back in sync, follow these steps.
Step 1: Try to locate a button on the receiver (the one that plugs into your computer). Proceed to the next step if your receiver device does not have a button. Some devices do not have one.
Step 2: After inserting the receiver into the PC port, press the button on the device. To finish the setup or dialogue, follow the on-screen prompts.

Step 3: Come up with a key on your keyboard now. It has to be on the underside or a side. Hit the “Connect” button.
Step 4: After you press the connect button, the receiver should turn green, or you should get a notification on your screen. This indicates that the synchronization process was fruitful.
If you don’t see anything, there must have been an issue with the receiver-keyboard connection. Keep going until you’ve finished all the steps outlined above.
Method 2: In the Control Panel, Turn Off Filter Keys
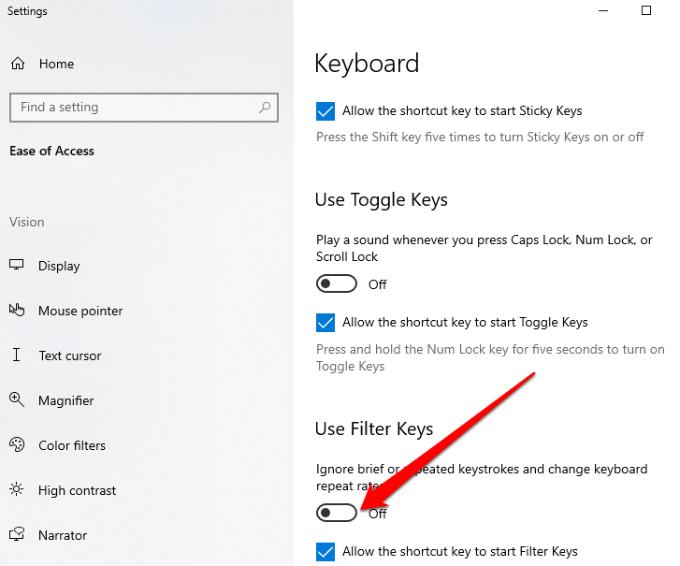
If you have trouble holding down many keys at once, you can use the Filter Keys accessibility feature with your Windows system to help you. This feature modifies how your Bluetooth keyboard responds and disregards the repeated key presses to accomplish this. If your computer’s Filters Keys feature is getting in the way of a wireless keyboard’s operation, it might stop working.
Step 1: Locate the Settings menu by right-clicking Windows.
Step 2: Navigate to the Accessibility tab in the left pane and scroll down to the end in the right pane.
Step 3: Next, go to the Interaction tab, then open the Keyboard. Then, choose Filter Keys. Turn off Filter Keys by clicking the switch next to it, then turn it back on.

Step 4: Next, close the Settings window after deactivating all of the options shown there. After that, turn off your computer and then turn it back on again to see if the wireless Bluetooth keyboard is working properly.
Method 3: Make Your Connection Mode Selection
On certain premium keyboards, there are dedicated buttons for switching between Bluetooth and RF/dongle modes. If you want to use the dongle with your keyboard, press the Wireless button. Press and hold the keyboard’s Bluetooth button to maintain Bluetooth pairing mode.
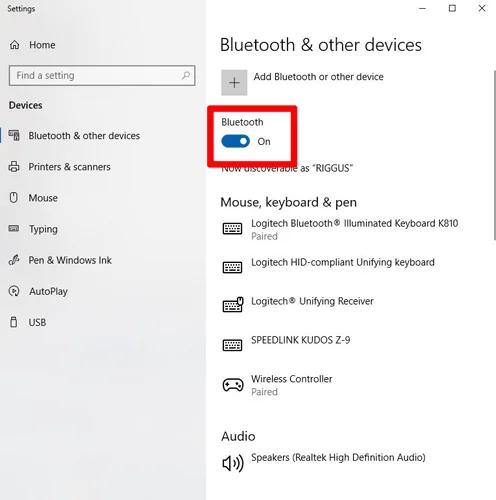
The next step is to pair the keyboard with Windows via the Bluetooth settings. You can’t use your keyboard until it says “Connected” in the status bar. As a result, you’ll have to fix the gadget again.
Try reconnecting the dongle if you’re still experiencing problems with that mode. Try connecting it to a different port on your PC to double-check it.
Tip: Update Keyboard Drivers With Advanced Driver Updater
If your drivers are out of date, Advanced Driver Updater will miraculously find and update them, making your computer run faster and smoother. To facilitate communication between your computer’s hardware and operating system, drivers are little pieces of code or programs. The OS can make better use of the hardware with up-to-date drivers.
Features:
- Enhanced Backup Performance
- Approves a wide range of devices
- Undelete Updates That Were Incompatible
- It brings the drivers into harmony
- Easy-to-use Design

How To Use Advanced Driver Updater?
Install Advanced Driver Updater from the button down below .
Step 1: After the installation, you can start the program by double-clicking the desktop shortcut.
Step 2: To activate the app, use the activation key with your purchase.
Step 3: To start scanning, click the Start Scan button.
Step 4: Fixing driver conflicts is as simple as clicking the Update All button.

Alright, you’ve finished. Indulge in your computer to an unprecedented degree.
Conclusion
If you’re having issues with your wireless keyboard, the first step is to try the solutions provided at the beginning of this article. If this does not resolve the issue, you may need to try more complex measures tailored to your problem. Contact the maker for additional guidance and assistance if everything else needs to be fixed. Hopefully, you will understand what to do if your keyboard not working.
Next Read:
How To Download And Update Microsoft Bluetooth Driver?
How to Update HP Wifi Driver for Windows 11, 10, 8, 7


Leave a Reply