Microsoft account is one of the most important requirements of a windows 10 computer user. However, many users are not aware that it is possible to create a Microsoft Account using a Gmail address or any other non-Microsoft email address.
Let us see the step by step tutorial for creating Microsoft Account Using Gmail ID.
Use Gmail or Yahoo! Mail to create Microsoft Account:
If you never used a Microsoft service and you are trying to login into Windows 10 computer for the first time, you will be prompted to create a Microsoft Account using your Microsoft Email ID and Password.
However, if are aware that it is possible to create a Microsoft Account using any email address like Gmail, Yahoo! Mail or any other email. Then you can create Microsoft Account.
The advantage of doing this is, suppose if you use your Gmail address to create Microsoft account on Windows 10, you will be able to use your Gmail address to sign in to Windows 10, instead of creating a new Outlook email ID.
In simple terms, when you create a Microsoft account using your existing Gmail ID, your Gmail ID works as Microsoft account ID, and you can use the same to sign in to Windows 10.
In this tutorial, I am using Gmail ID to create Microsoft account, however, you can use any other non-Microsoft email address.
Create Microsoft Account Using Gmail On Windows 10:
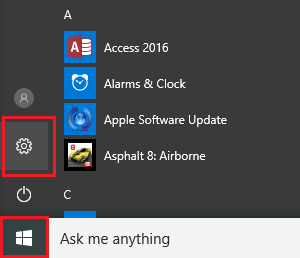
- Click on the Start button and then click on the Settings icon in the menu that appears.
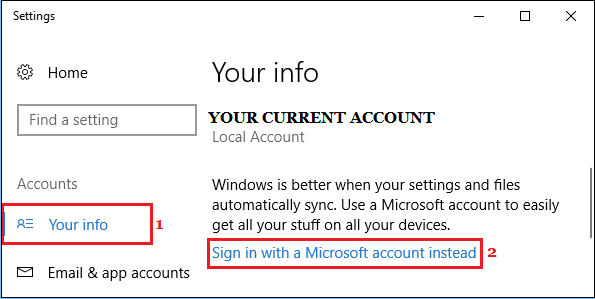
- On the Settings screen, click on the Accounts option.

- Here, click on the link Sign in with a Microsoft Account instead link.
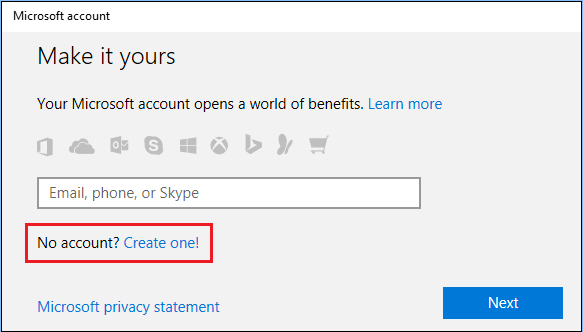
- You are here because you don’t have a Microsoft account yet. So, to create one, click Create one!
- On the next screen, enter your Gmail address, your password, your country and other details, and click Next.
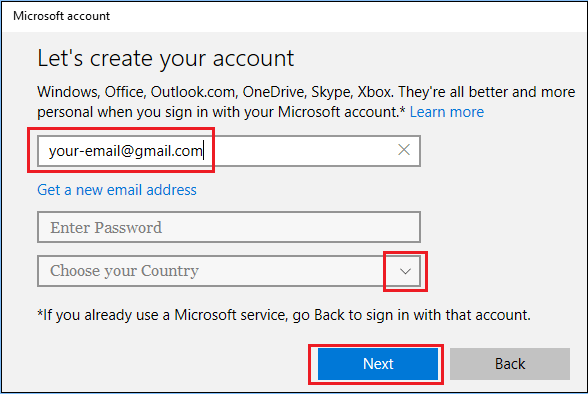
Please don’t click the Get a new email address( If you click on this link, it will open a new dialog to sign up for a new Microsoft account by creating a new Outlook.com email address).
- On this screen, you can allow Microsoft to send you promotional offers and use your Account information for advertising (in case you want to) and click on the Next button.

- You will be asked to enter your local user account. Enter the password or leave the field blank if you haven’t set up a password for your account yet and then click Next.

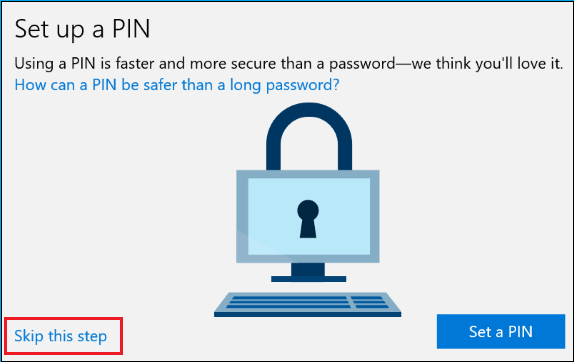
- You can skip the next screen by clicking on Skip this Step or click on Set a PIN button in case you do want to create a PIN.
- The next step is to verify your new Microsoft User Account by clicking on the Verify Link.
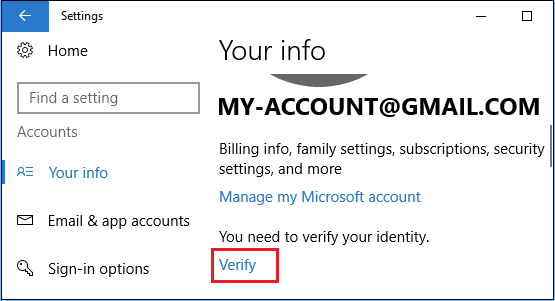
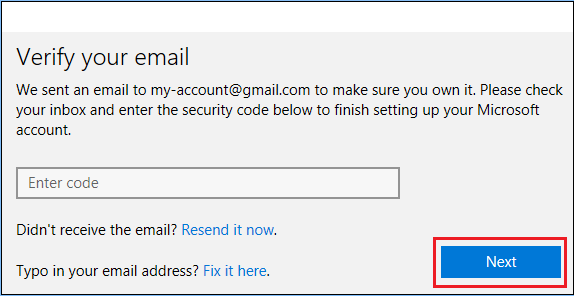
Once you click on Verify, Microsoft will send a confirmation code to your Gmail Account. Login to your Gmail Account and get the confirmation code.
- On the next screen, enter the Confirmation Code and click on the Next button.
Once your Microsoft Account is verified, you are all set and ready to enjoy the benefits of using a Microsoft Account on your Windows 10 computer, without using a Microsoft or Outlook.com email ID.
Note: From now on you will be logging in to your Windows 10 computer using the Microsoft Account that you just created using Gmail.
Also Read: How to Assist Your Friend and Family Remotely Using Quick Assist in Windows 10


Leave a Reply