Every time you visit a website on your Mac you get some or the other error, or, it takes forever to load. There are chances that you need to flush DNS on Mac.
As a Mac user have you ever been advised to flush the DNS cache Mac on a regular basis? If yes, in this post, we’ll dive deeper and understand why it is important to flush the DNS cache5 on Mac and how to do it.
But, first, let’s quickly get down to some basics.
What is DNS? Why Flush Mac DNS?
DNS stands for Domain Name System. Whenever you type a website’s name in the search bar of your browser, the DNS translates it into an IP address. This way web browsers can load internet resources.
Now that we have a basic idea of what DNS is, let’s get a basic idea of why you should flush DNS on Mac.
Let’s assume, you are visiting the website on your Mac for the first time. Your Mac will save this route between the domain name and IP. This way you will be able to load the website faster in the future.
Did you know that flushing DNS on Mac doesn’t just aid in accessing websites but also helps secure them? But, first, let’s see how easy it is to flush DNS on Mac.
How To Flush DNS on Mac?
Here are some simple ways to flush DNS on Mac –
Method No. 1 – Using The Terminal
With the help of the Terminal, you can easily flush the DNS on your Mac.
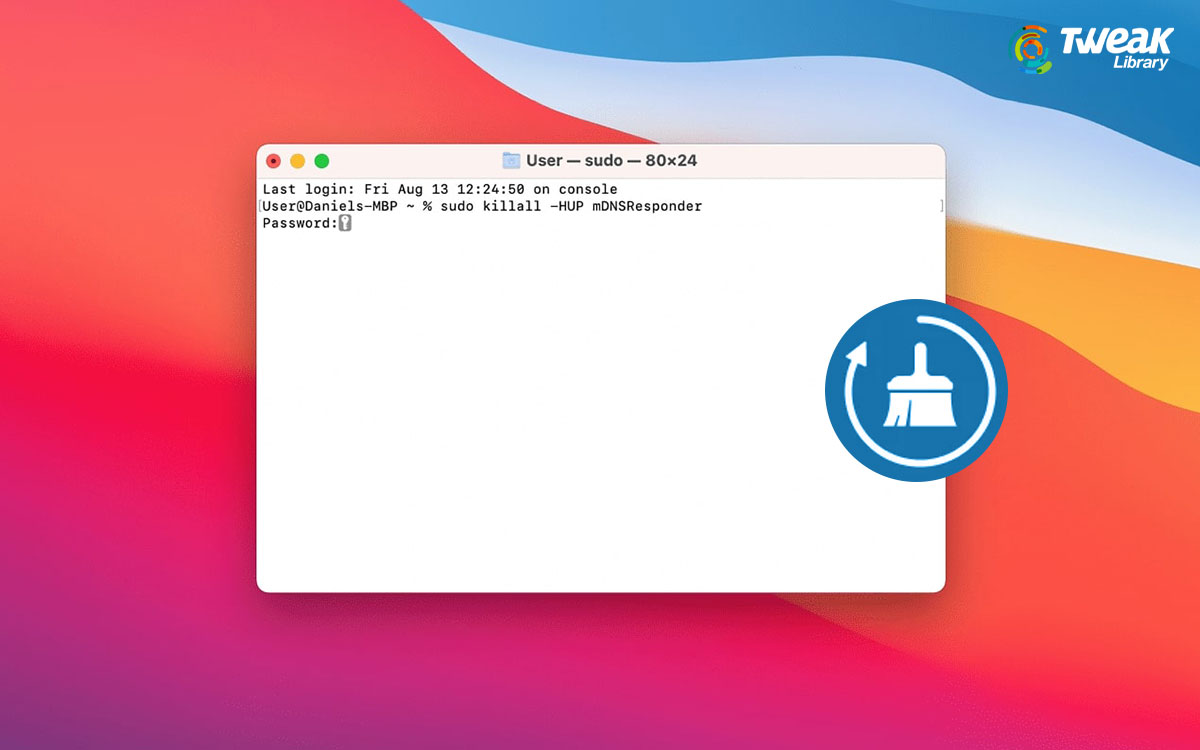
Step 1 – Open the Launchpad and type Terminal.
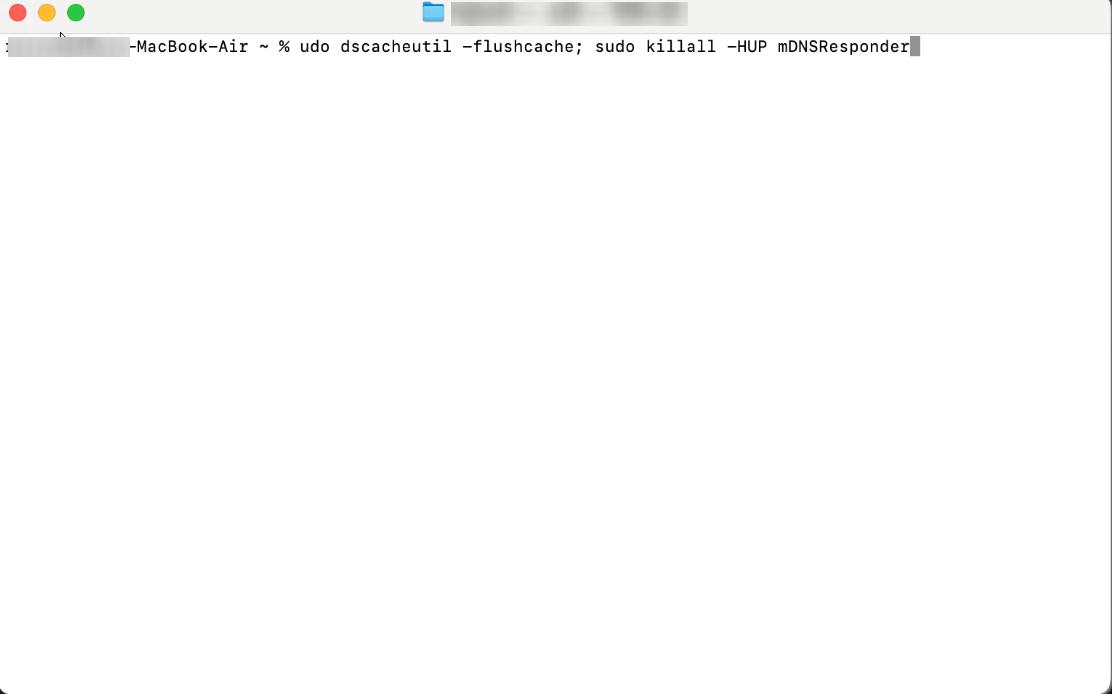
Step 2 – When the Terminal opens, type or copy and paste – sudo dscacheutil -flushcache; sudo killall -HUP mDNSResponder
Step 3 – Press Return, enter your password and again press Return.
Running an Older Mac Version?
If you are running an older version of Mac, all you have to do is replace the sudo dscacheutil -flushcache; sudo killall -HUP mDNSResponder with the ones given below –
| macOS Version | Enter this command in the terminal |
| macOS Ventura
macOS Monterey macOS Big Sur macOS Catalina |
sudo dscacheutil -flushcache; sudo killall -HUP mDNSResponder |
| macOS Mojave
macOS High Sierra macOS Sierra OS X Mountain Lion Mac OS X Lion |
sudo killall -HUP mDNSResponder |
| Mac OS X El Capitan
OS X Mavericks
|
sudo dscacheutil -flushcache;
sudo killall -HUP mDNSResponder |
| OS X Yosemite | sudo discoveryutil mdnsflushcache;
sudo discoveryutil udnsflushcaches |
| Mac OS X Snow Leopard
Mac OS X Leopard |
sudo dscacheutil -flushcache
|
| Mac OS X Tiger | lookupd -flushcache |
Method No. 2 – Using A Third-Party Tool
Step 1 – Download CleanMyMac and run the installation file.

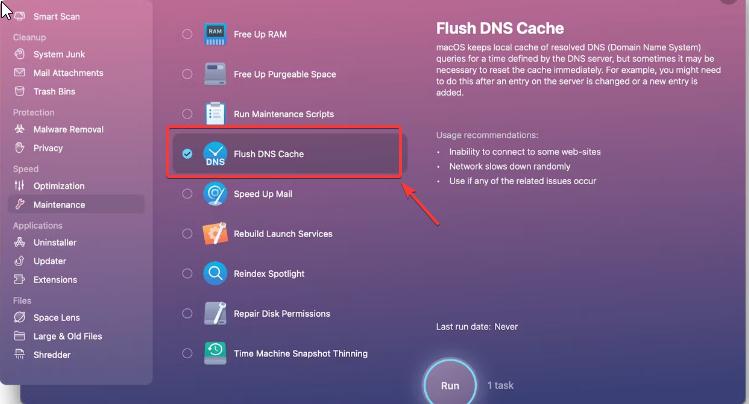
Step 2 – From the left-hand pane, click on Maintenance.
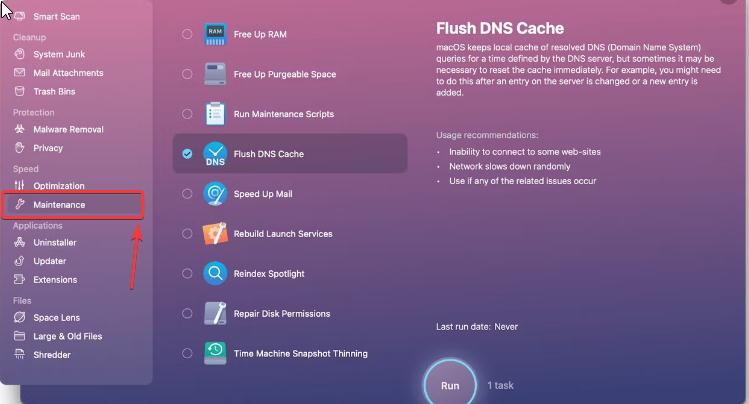
Step 3 – From the right-hand side, click on Flush DNS Cache
Method No. 3 – Clear DNS Cache in Browser
You can also use your browser to clear the DNS cache. Here we are going to take the example of Google Chrome –
Step 1 – In your Chrome browser, open a new tab by pressing Ctrl + T.
Step 2 – In the URL bar, copy and paste chrome://net-internals/#dns
Step 3 – Click on Clear host cache as seen in the screenshot below.
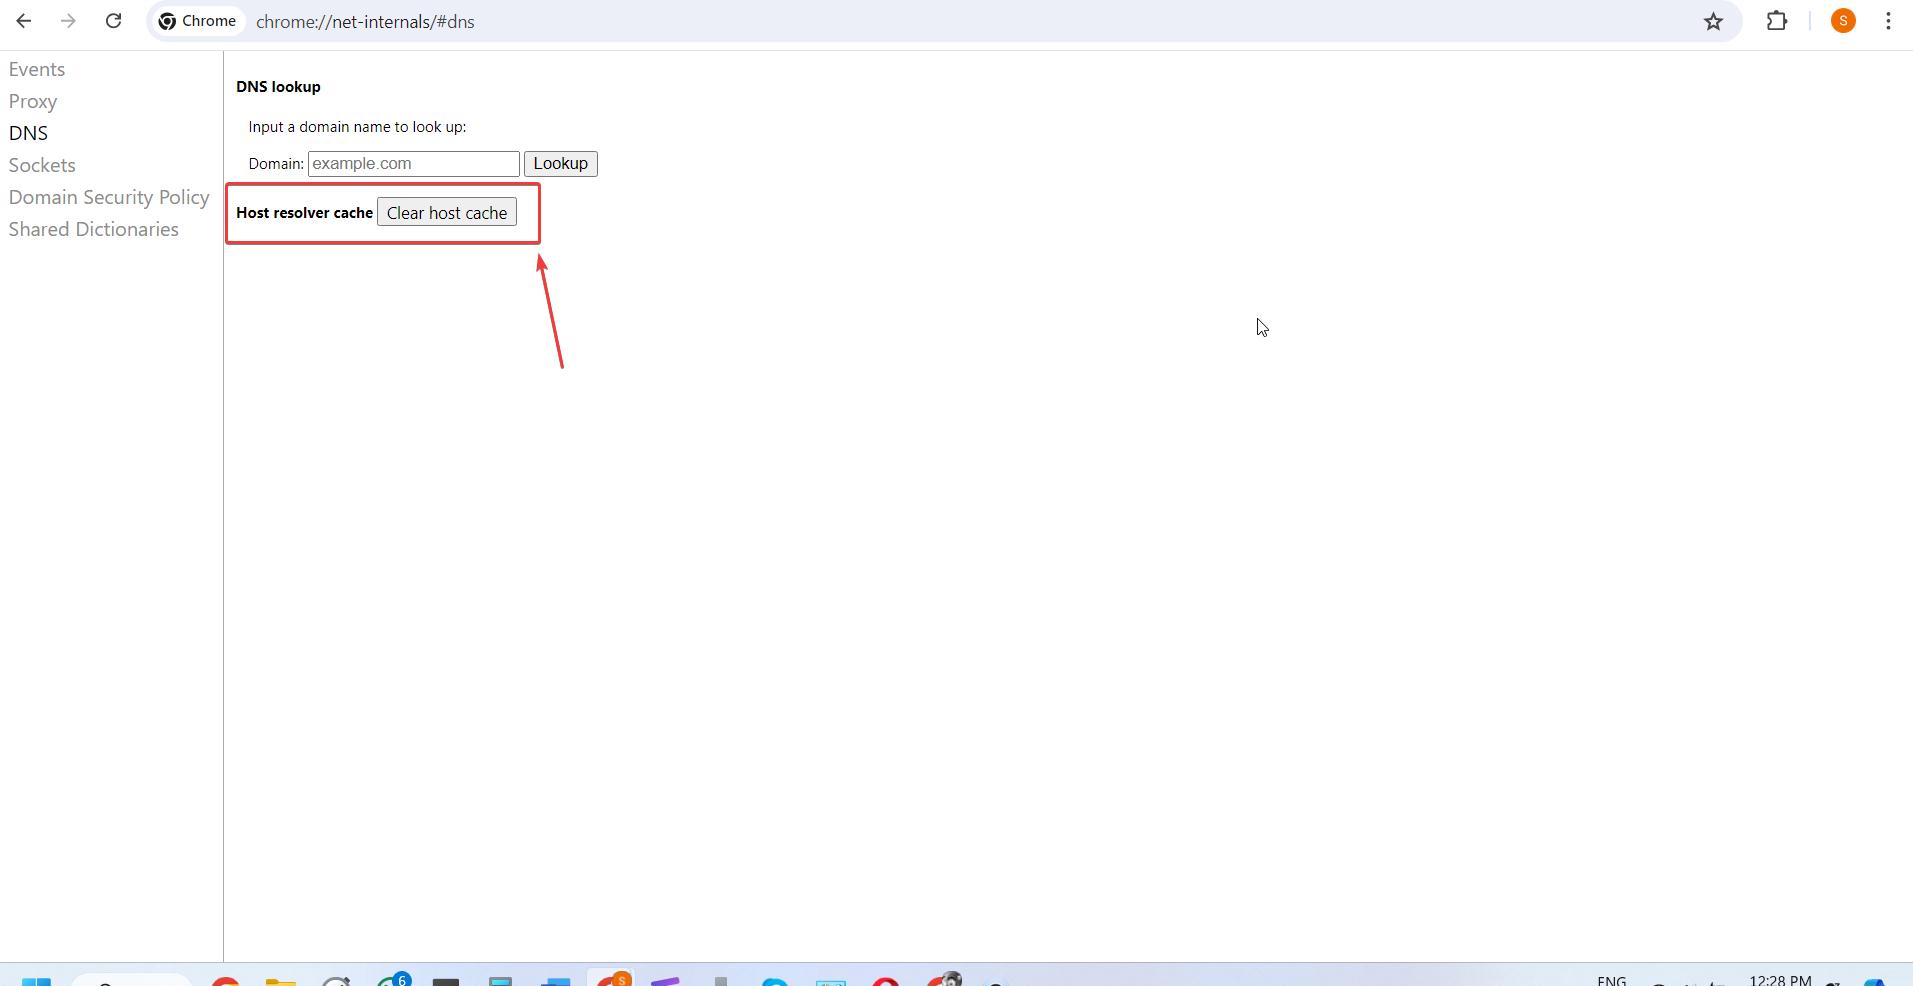
And that’s how easy it is to flush DNS cache on Mac via your browser.
Why Flush DNS On Mac?
Regularly flushing the DNS on Mac is advisable for various reasons. Some of these are mentioned below –
– Clear Any Outdated Information
Websites often change their IP addresses. By not flushing the DNS cache on Mac regularly, you might enter a website whose IP address may have been changed. This will lead to connection failure or lead to loading issues.
– Prevent DNS Spoofing
Frequent flushing of DNS on Mac can help prevent network-related security threats. For instance, you can stop hackers from manipulating or changing the IP address associated with the domain name of a website. Additionally, you can use a VPN service to spoof your location by changing your IP address.
– Stop Seeing 404 Error
In case you have cached the DNS information of a site that has moved to a new host or domain name, you can clear your DNS cache on Mac. This way you won’t be visiting an outdated version of the website or subsequently running into error 404.
– Keep Search Behavior Private
Apart from cookies, even your DNS cache can reveal a lot about you to bad actors or data collectors. By flushing DNS regularly you can prevent your search history from going into the hands of data collectors.
Flush DNS Cache Regularly For Browsing Smoothly and Safely
As can be ascertained from this post, flushing the DNS cache on Mac can help you browse the internet smoothly as well as maintain security. By clearing outdated DNS entries you can connect to the most up-to-date IP address and even thwart any security issues like DNS poisoning.
If you liked this post and feel that it could also help a friend who uses Mac, do share it with them. For more such content keep reading Tweak Library.


Leave a Reply