Microsoft Print to PDF is an amazing Windows 10 built-in feature that helps print PDF files easily. This feature reduces the need for using third-party applications. But there are many users who complain that Print to PDF feature doesn’t work.
Fortunately, for such users, we have a solution. Here in this article, we will explain how to resolve Microsoft Print to PDF Windows 10 Not working. We recommend you follow the instructions step by step to get it working.
4 Ways to fix – Microsoft Print to PDF not working on Windows 10
Method 1: Disable Microsoft Print to PDF and re-enable it
1. To do so, type Turn Windows features on or off.
2. In the new window that opens scroll down and looks for Microsoft Print to PDF option. Uncheck the box and click ok.
3. Restart your Windows 10 to bring changes into effect.
4. Once the system is rebooted follow step 1 again to open the Windows Features window. This time instead of clearing the box check the box next to Microsoft Print to PDF.
5. Click Ok.
Now try to use the feature it should work properly.
However, if this doesn’t fix Microsoft Print to PDF head to next method.
Method 2: Make sure there is no comma in the file name
When using Microsoft Print to PDF feature you need to give a name to the file. If a comma is added to it then the file is created with 0 bytes. This means you will not be able to find it and it might look like Print to PDF is not working. Therefore, to avoid such a problem avoid using special characters while saving the file.
Method 3: Set Microsoft Print to PDF as the default printer
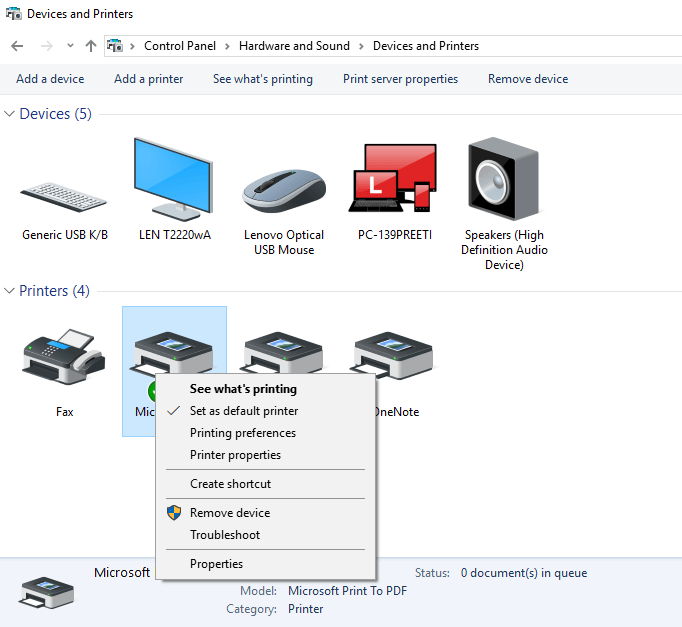
1. For this type Control Panel in the search bar.
2. In the consecutive window click on Hardware and Sound > Devices and Printers.
3. Next, look for Microsoft Print to PDF under printers.
4. Right-click on it > Set as default printer.

Now, try and use Microsoft Print to PDF feature it should work. If this method doesn’t work, no problem we have another way.
Method 4: Remove Microsoft Print to PDF and reinstall the driver
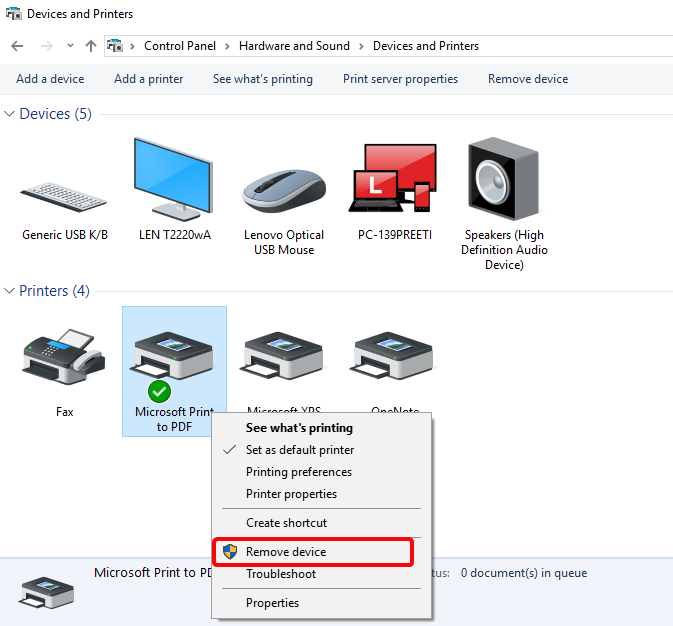
1. For this type Control Panel in the search bar.
2. In the consecutive window click on Hardware and Sound > Devices and Printers.
3. Next, look for Microsoft Print to PDF under printers.
4. Right-click on it > Remove device.

5. Click Yes, when asked for confirmation.
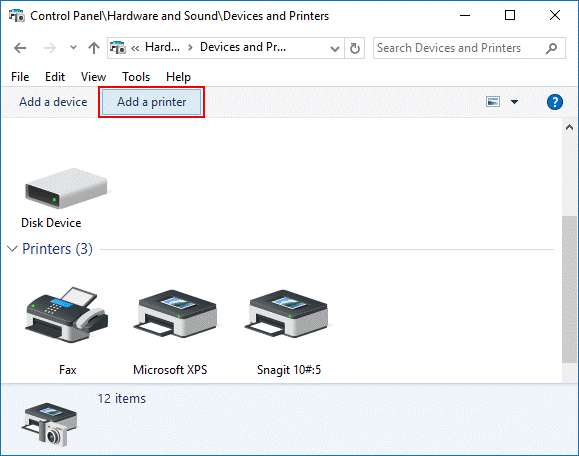
6. Now click on Add a printer.
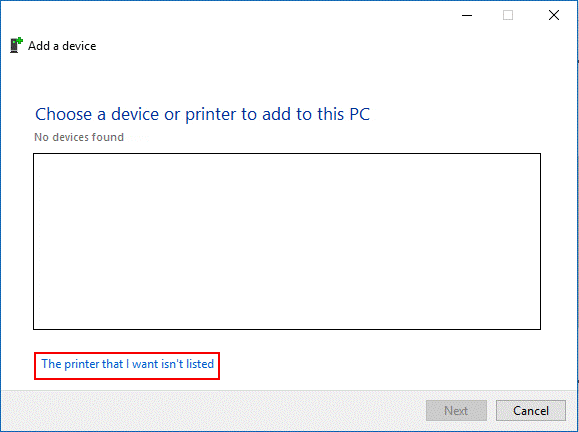
7. Next, click on The printer that I want isn’t listed.

8. Now select Add a local printer or network printer with manual setting from the consecutive window and click Next.
9. Select Use an existing port and choose PORTPROMPT: (Local Port) from the drop-down > Next.
10. Now select the manufacturer Microsoft from left pane > Microsoft Print to PDF from right pane > Next.
11. Select Replace the current driver > Next.
12. Type name of the printer.
13. You have now successfully restored Microsoft Print to PDF.
14. Click Finish to complete the process.
You will now be able to use Print to PDF.
In addition to this, if you face a computer not recognizing printer error you can fix it too.
Want us to recommend an easy solution?
If none of the fixes work for you, or you just don’t have enough time to follow all these steps let us help you. All you need to do is download and install Smart Driver Care. This driver updating tool will not only help resolve Microsoft Print to PDF problems but will fix also fix other driver-related issues.
Download Smart Driver Care Here
Smart Driver Care is an ideal solution to keep your system drivers up to date. This advanced tool identifies outdated or missing drivers and allows you to update them. Moreover, Smart Driver Care gives you the option to backup all or selective drivers before updating to new ones. This helps restore the driver if there’s any problem. In addition to this, you can even schedule driver updating for ease of use. Give this tool a try today.
That’s all for now if you have any questions please feel free to leave us a comment.


Leave a Reply