The Phone Link app (previously known as “Your Phone”) is an application on your Windows PC that lets you access your Android or iOS smartphone on your PC or laptop itself. With this app, you can check your calls, texts, and notifications on your PC. You can even make or receive calls directly from your computer and don’t need to pick up your smartphone to do the same.
But, what if despite trying everything, you find out that the Phone Link app is not working on your Windows 11 PC? Here we’ll discuss all the possible ways in which you can fix the issue.
Where You Could Be Going Wrong?
Before diving into advanced measures let’s first rule out some basic mistakes. The reason you are not able to connect your Android or iOS smartphone with your Windows computer using the Phone Link –
1. Ensure That The Bluetooth is Turned On

Sometimes you may not realize but it is likely that the Bluetooth is disabled on either device (either on your smartphone or on your PC). If that’s the case, the Phone Link app won’t work. So, the first thing that you want to check is if the Bluetooth is disabled on either device.
2. Configure the Phone Link Correctly
While setting up the Phone Link to access an Android or iOS smartphone is a simple process, let’s run you through the steps –
Step 1 – Choose the device you want to link (Android or iOS)
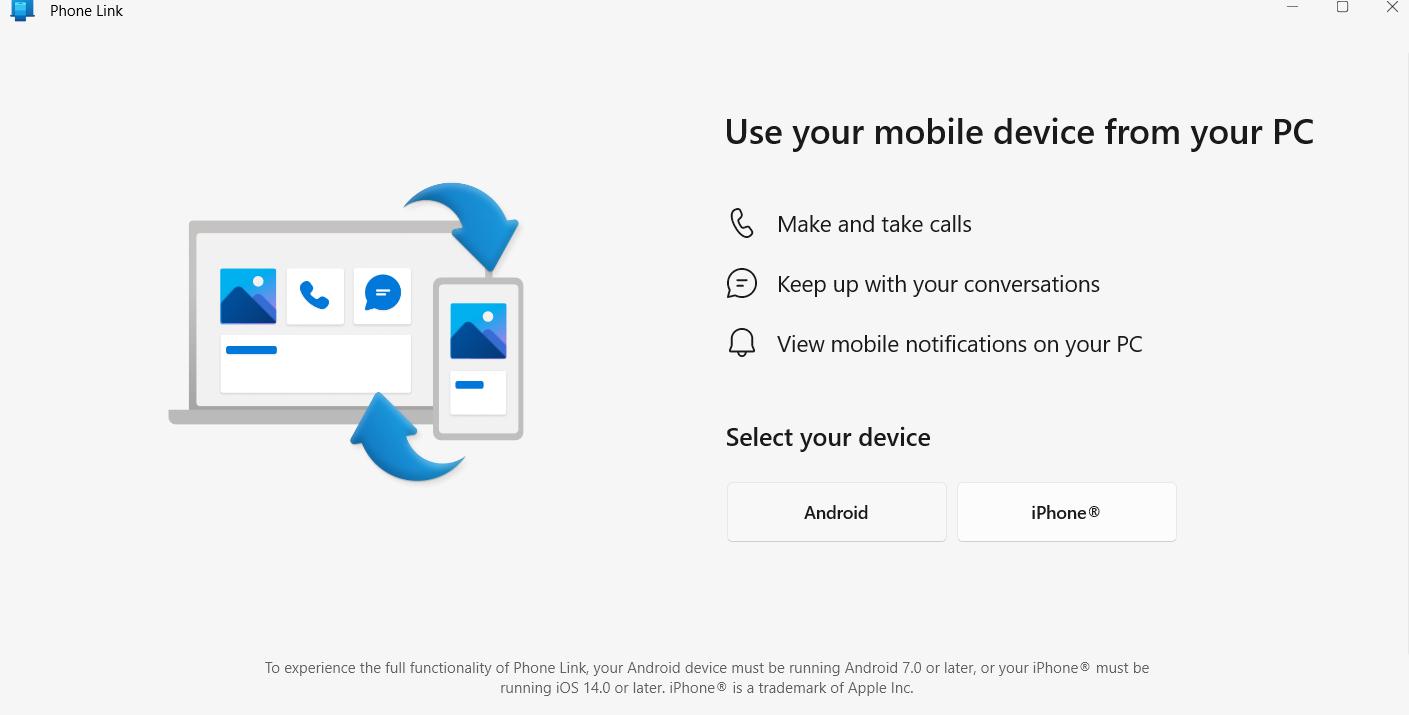
Step 2 – Scan the QR that appears on the screen using your camera app or QR code scanning app.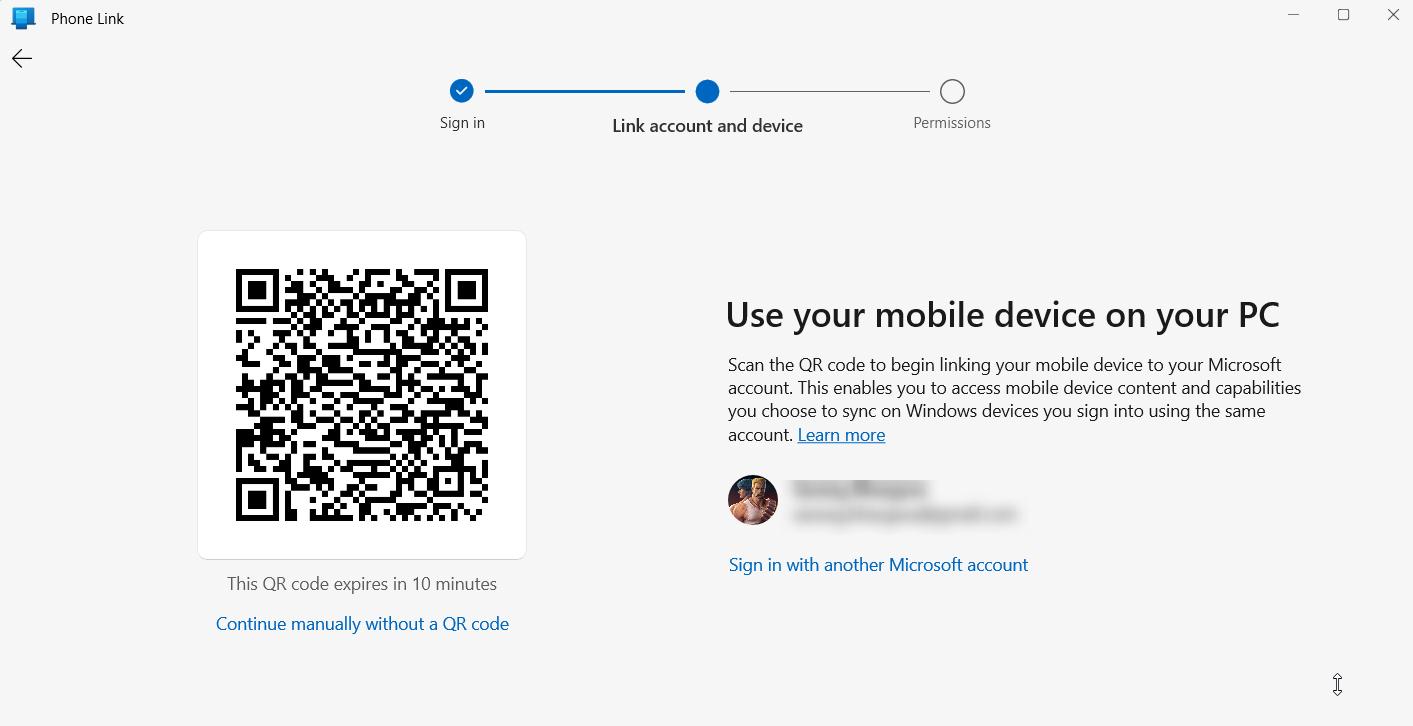
It is important that you scan the QR code within the specified time else it will expire.
Step 3 – Click on Continue on both devices (smartphone (iOS or Android), and computer).
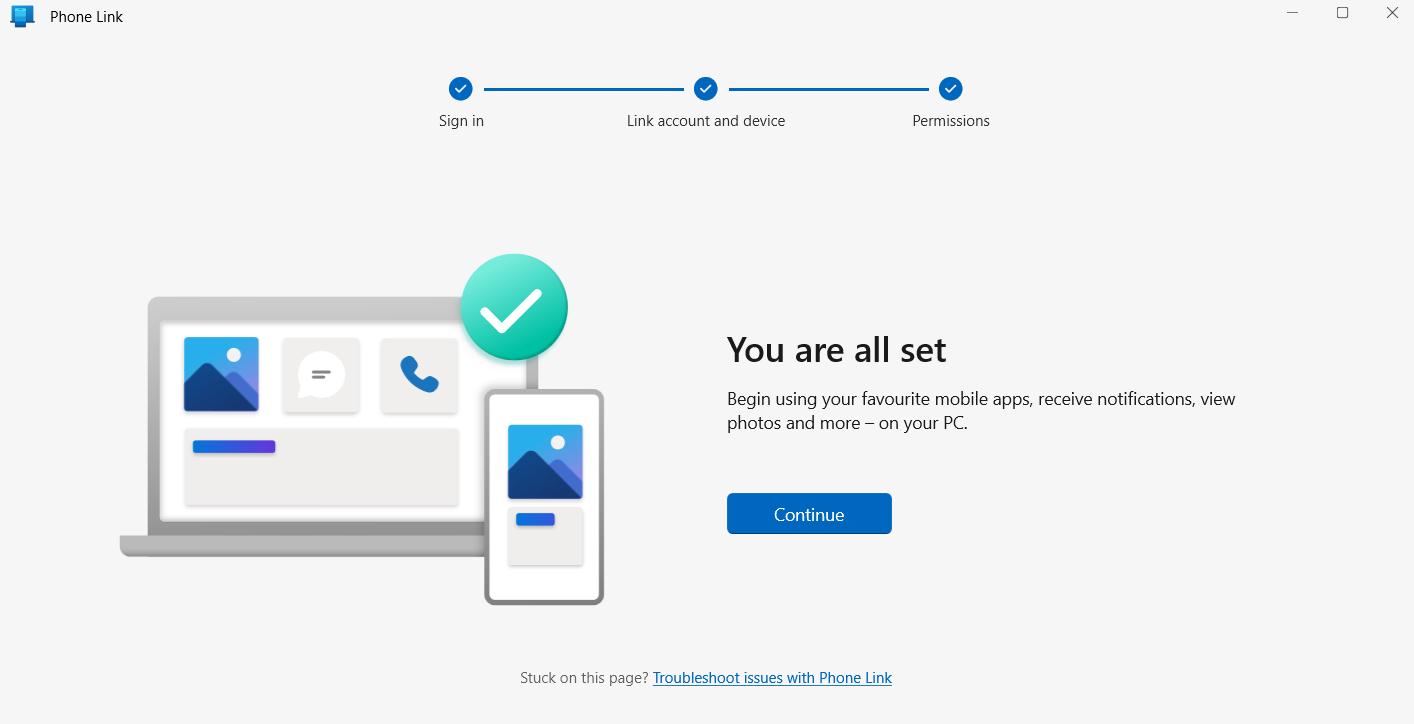
Step 4 – Give the necessary permissions by tapping on Open and giving the permissions.
3. Install The ‘Link To Windows’ App on Your Android Device
By installing the ‘Link To Windows’ app from the Google Play Store, you can transfer single or multiple files directly between your Android device and your Windows computer. You won’t need to connect your Android device to your PC via a USB cable. All you have to do is go to the file that you want to send to your computer, tap on the share button, and select Send to PC.
How To Fix Phone Link App Not Working on Android or iOS?
Solution No.1 – Check If You Have Enabled All The Necessary Permissions
To sync your Android or iOS smartphone with your computer using the Phone Link app, you have to give certain permissions, failing which the Phone Link app won’t work –
Step 1 – Open the Phone Link app.
Step 2 – Click on the Settings (cog-shaped icon) from the top right-hand side corner.
Step 3 – From the left, click on Features.
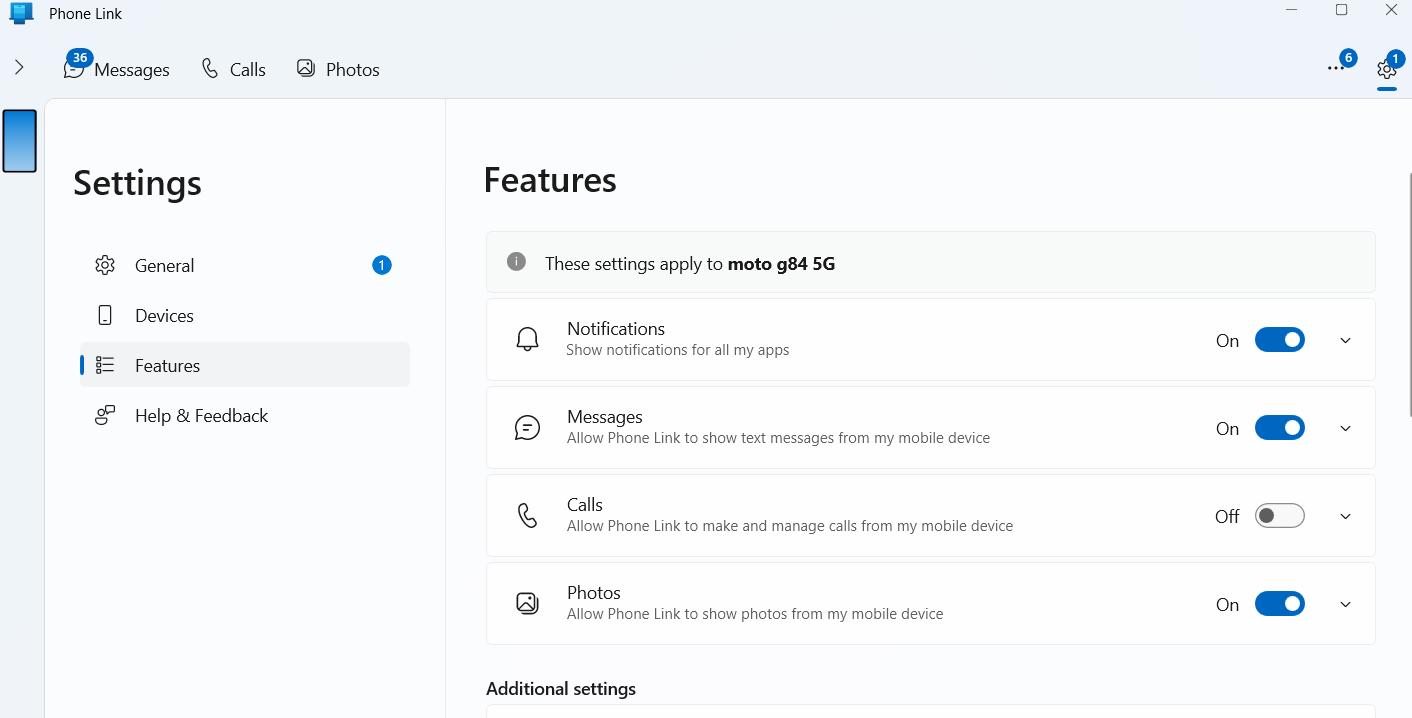
Step 4 – Check that you have toggled on switches next to all of the features. This also includes clicking on the dropdowns next to all the features and checking if all the checkboxes are marked.
Solution No.2 – Run The Bluetooth Troubleshooter
In case, your Windows PC’s Bluetooth is acting up, you won’t be able to establish a connection between your smartphone and your computer.
Step 1 – Press Windows + I to open the Settings.
Step 2 – From the left-hand side, click on System, and from the right, scroll down and click on Troubleshoot.
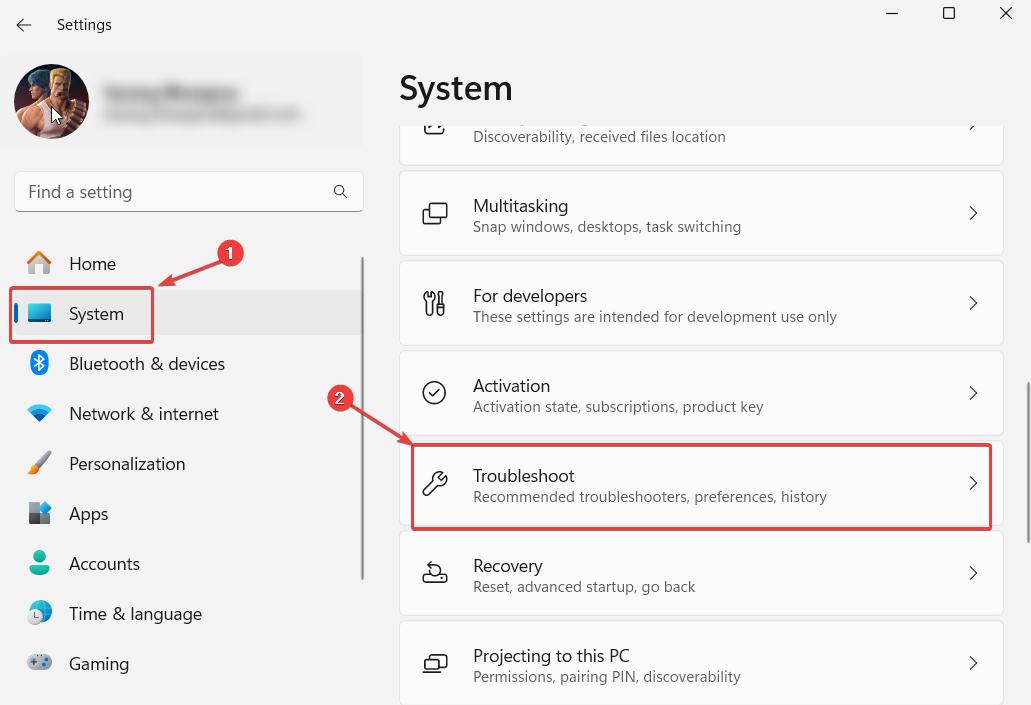
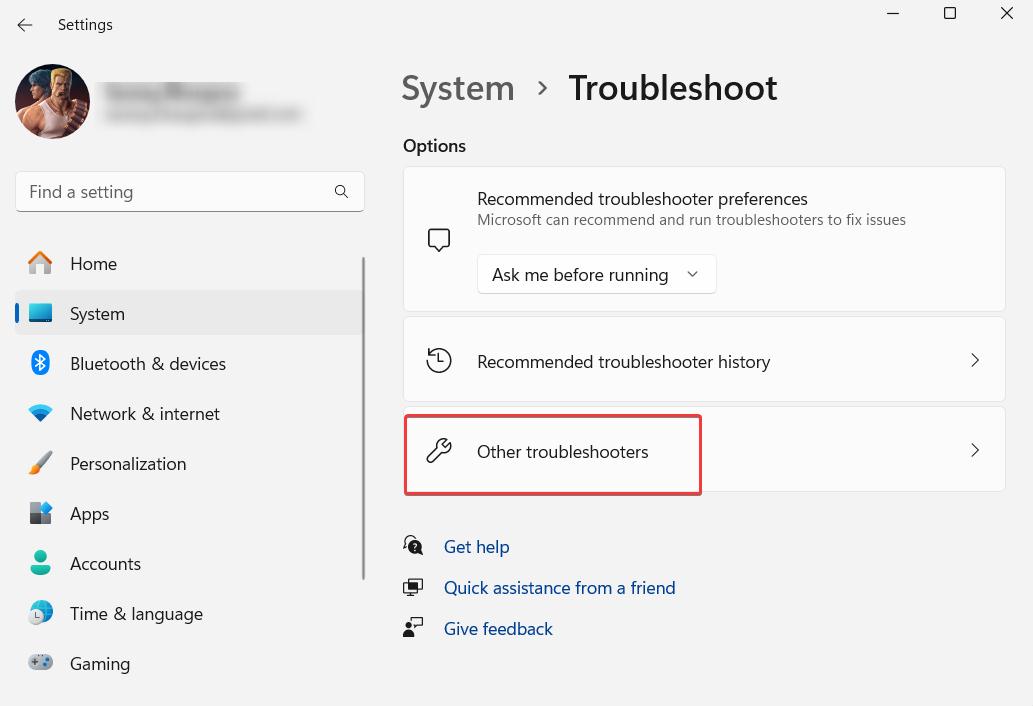
Step 3 – Click on Other troubleshooters.
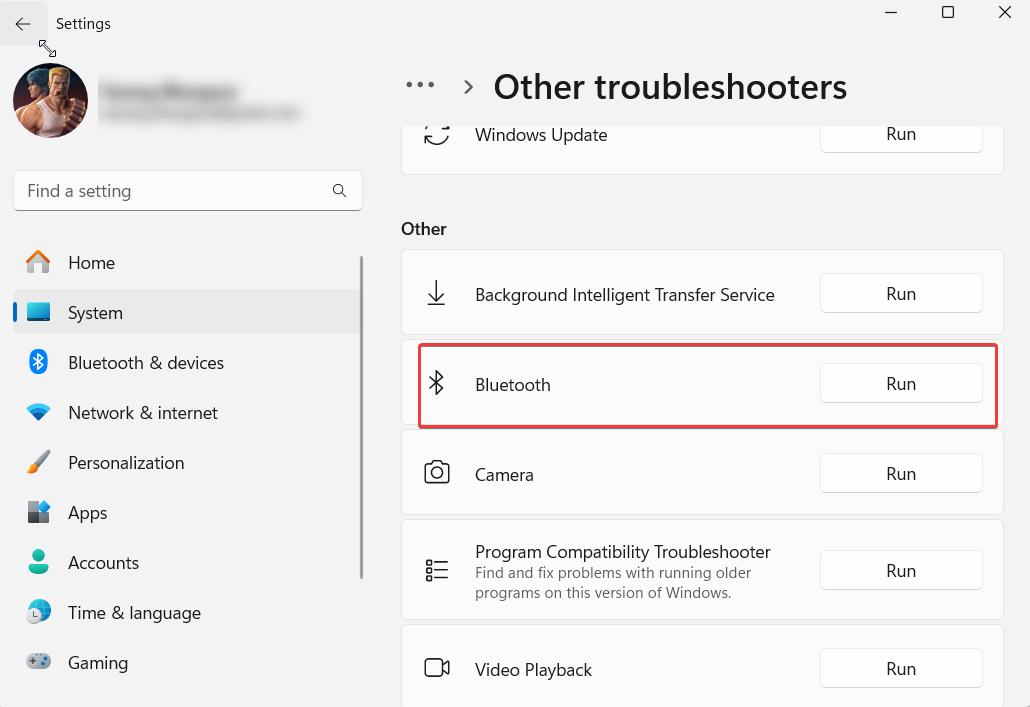
Step 4 – On the next page, under Other, click on Run next to Bluetooth.
If the above steps are offering no help as far as Bluetooth-related issues are concerned, you can try out the steps mentioned in this post.
Solution No.3 – Allow The App To Run In The Background
A common reason why your Phone Link app isn’t syncing your Android or iOS device could be that it lacks the necessary permissions to run in the background. Here are the steps to allow the app to run in the background.
Step 1 – Press Windows + I to open the Settings.
Step 2 – From the left-hand side, click on Apps.
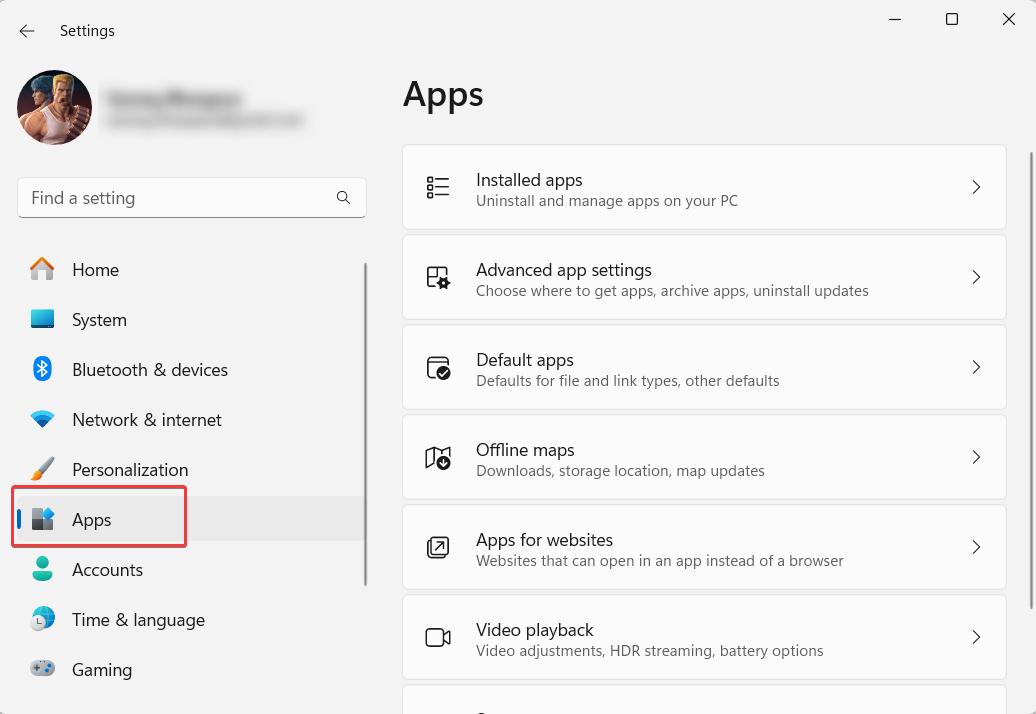
Step 3 – Click on Installed apps from the right.
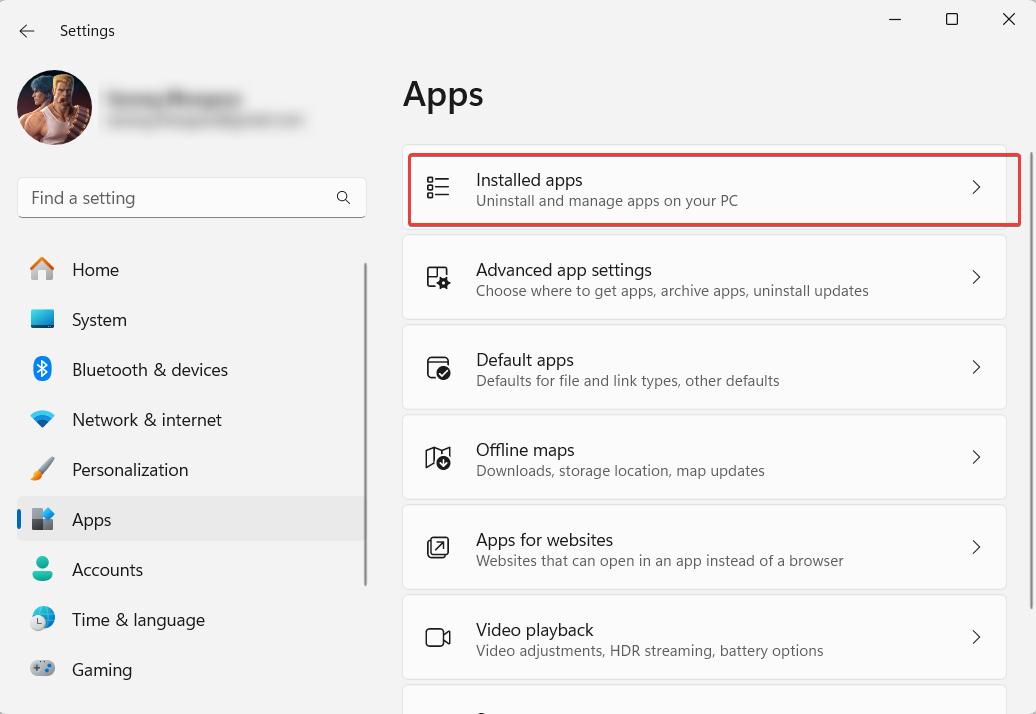
Step 4 – Locate the Phone Link app, click on the three dots next to the app name, and click on Advanced options.
Step 5 – Click on the dropdown under Background apps and select Always.
Solution No. 4- Unlink and Link Your Phone Again
Until now if the Phone Link app is still not working, and you are unable to access your smartphone on your PC, you can try unlinking and then re-linking it. In most cases, this step helps to reestablish the connection. To unlink the device –
Step 1 – In the Phone Link app, click on the Settings (cog-shaped icon) from the top right-hand corner.
Step 2 – From the left-hand side, click on Devices.
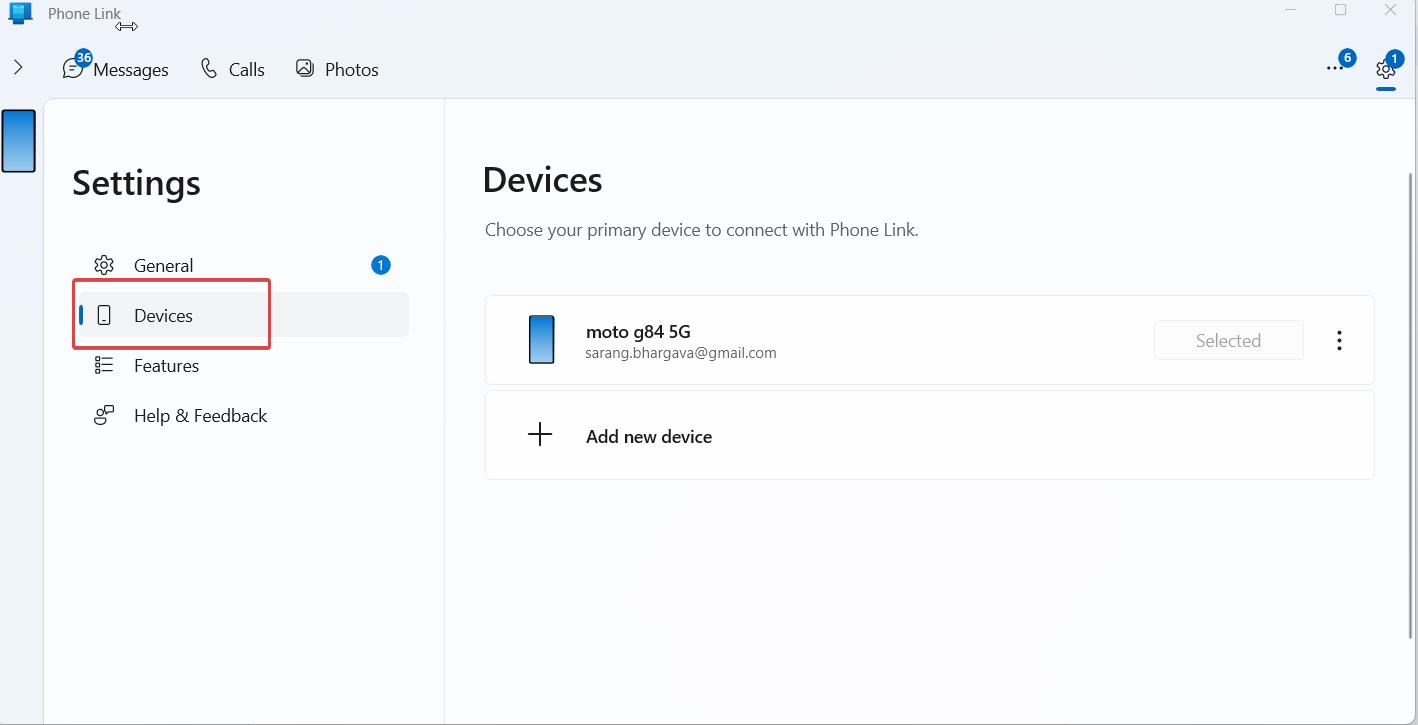
Step 3 – On the right, you will be able to see your device, click on the three vertical dots and click on Remove. Follow the on-screen instructions that appear next.
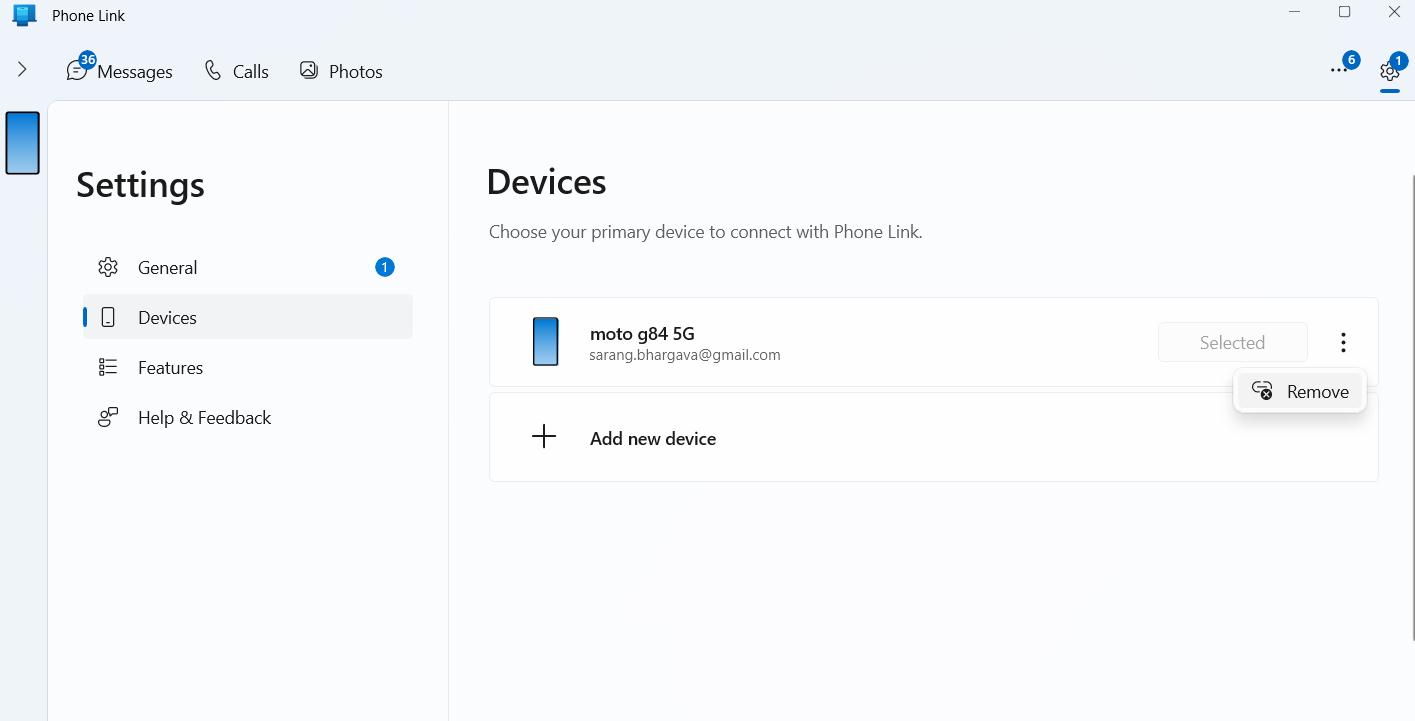
Once you have unlinked your device, use the steps mentioned at the start of the post to link your Android or iOS smartphone again.
Solution No.5 – Reset or Repair The App
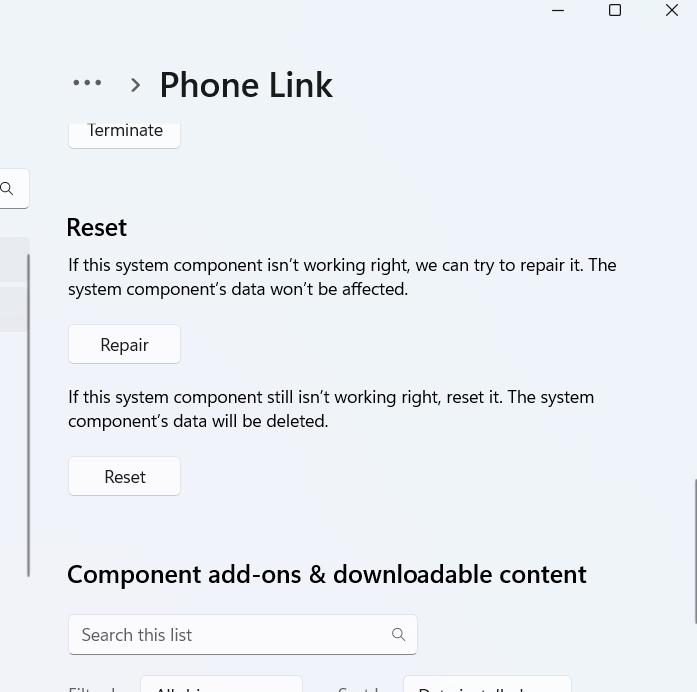
Step 1 – In the Windows search bar type Phone Link. From the right, click on the dropdown under Open and click on App settings.
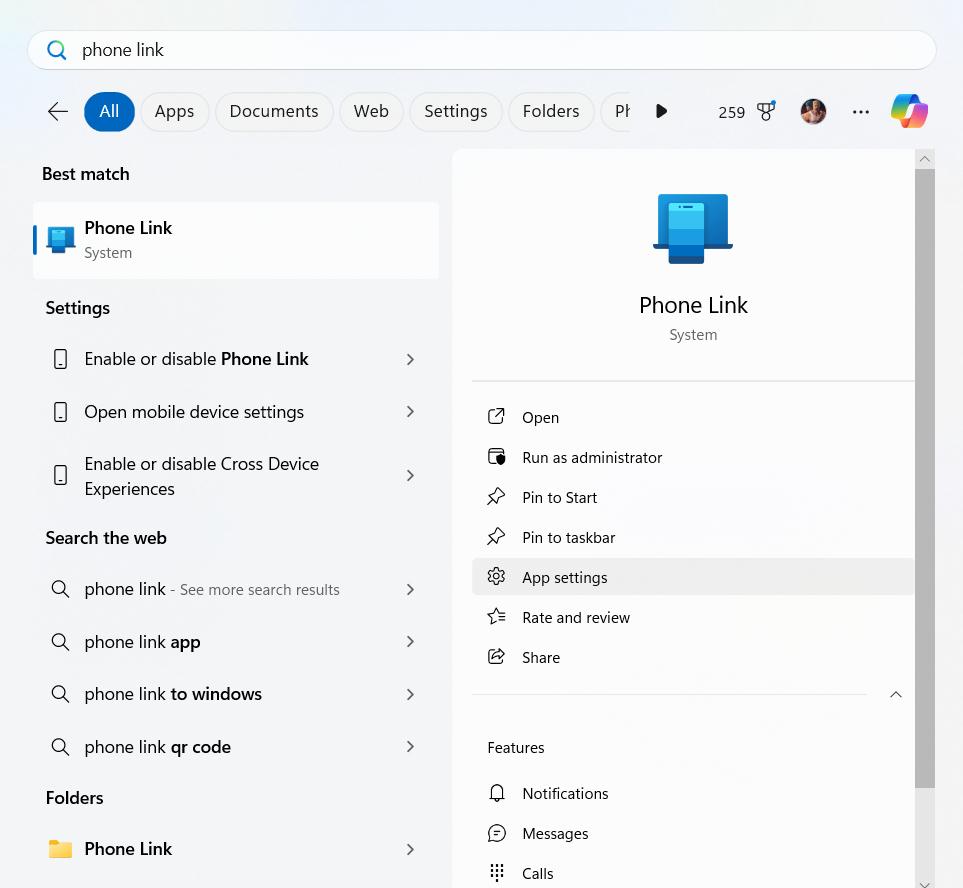
Step 2 – Scroll down and click on either options Repair or Reset and follow the on-screen instructions.
Solution No.6 – Update The App
An outdated version of the Phone Link is more prone to issues. You should, therefore, check if you are running an older version of the Phone Link app on your Windows computer. If so, update the app and then retry establishing a connection between your Windows PC and your Android or iOS smartphone –
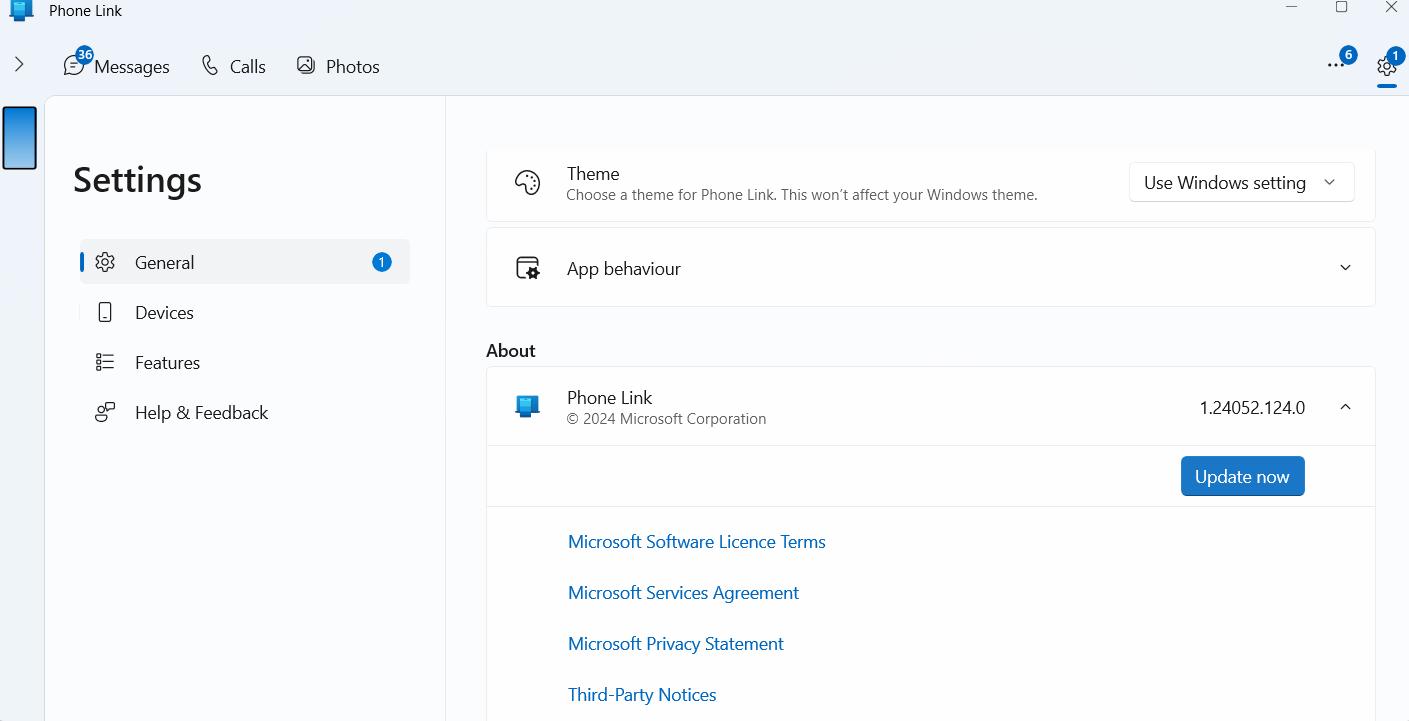
Step 1 – Open the Phone Link app on your computer.
Step 2 – Click on the Settings icon from the top right-hand side corner of the interface.
Step 3 – Click on General from the left, and from the right, click on the Update button under About.
Solution No.7 – Turn Off The Battery Saver Mode
The battery saver mode on your Windows 11 laptop could be the reason why you are unable to sync your Android/ iOS smartphone with your PC via Phone Link. That’s because the battery-saver mode restricts any background app activity. And, as we mentioned in one of the steps above, it is crucial to allow the Phone Link app to run in the background. It would also help if you disable the battery-saver feature on your Android or iOS device as well.
Before you follow the steps mentioned below, ensure that your laptop has sufficient battery. To turn off the battery-saver option on your Windows 11 laptop, follow the steps mentioned below –
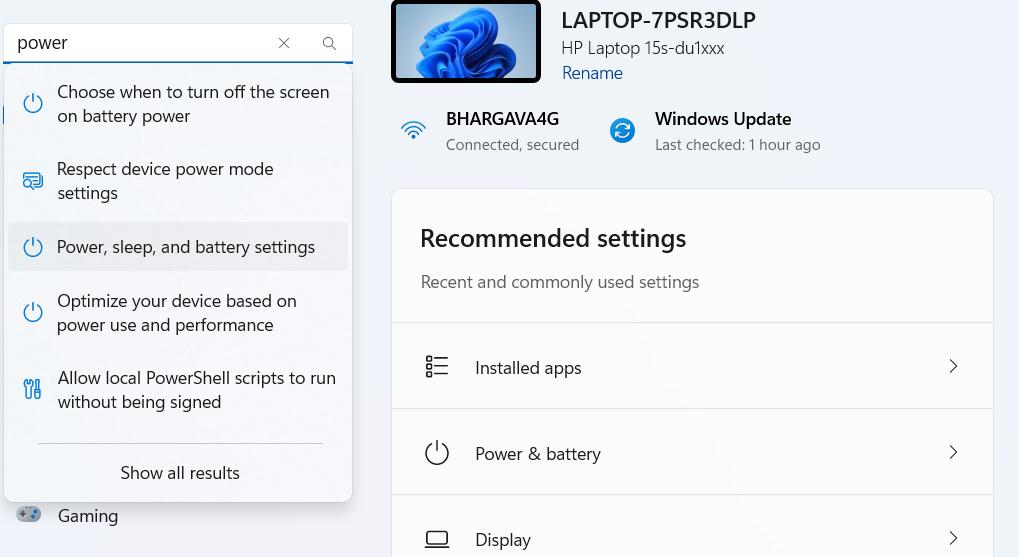
Step 1 – Open Settings by right-clicking on the Windows icon and selecting Settings.
Step 2 – In the search bar on the right-hand side, type power and select Power, sleep, and battery settings.
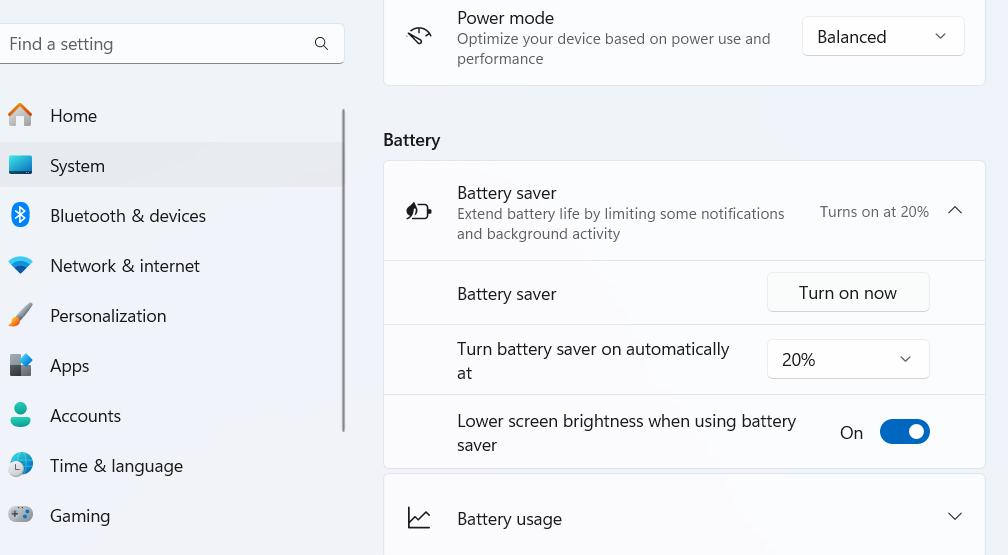
Step 3 – On the right-hand side, scroll down. Under Battery, click on the Battery saver dropdown, and click on the button next to Battery saver to turn it off.
The Phone Link Is A Boon Provided It’s Working
The Phone Link app, for sure, eliminates the need to pick your Android/ iOS device to answer calls, see messages and notifications, and even transfer files. But, all this won’t be of any use, if the Phone Link app is not working. This should not hold you back, because just like any issue, even this can be fixed.
That’s exactly what we have tried to do here. If the Phone Link app on your computer is back on track now, do share with us the solution that helped you out. For more such content, keep reading Tweak Library.
If you are facing any more such tech-related issues, need suggestions on the best apps and software or just have a germ of a tech idea that you want to put across. We are all ears.


Leave a Reply