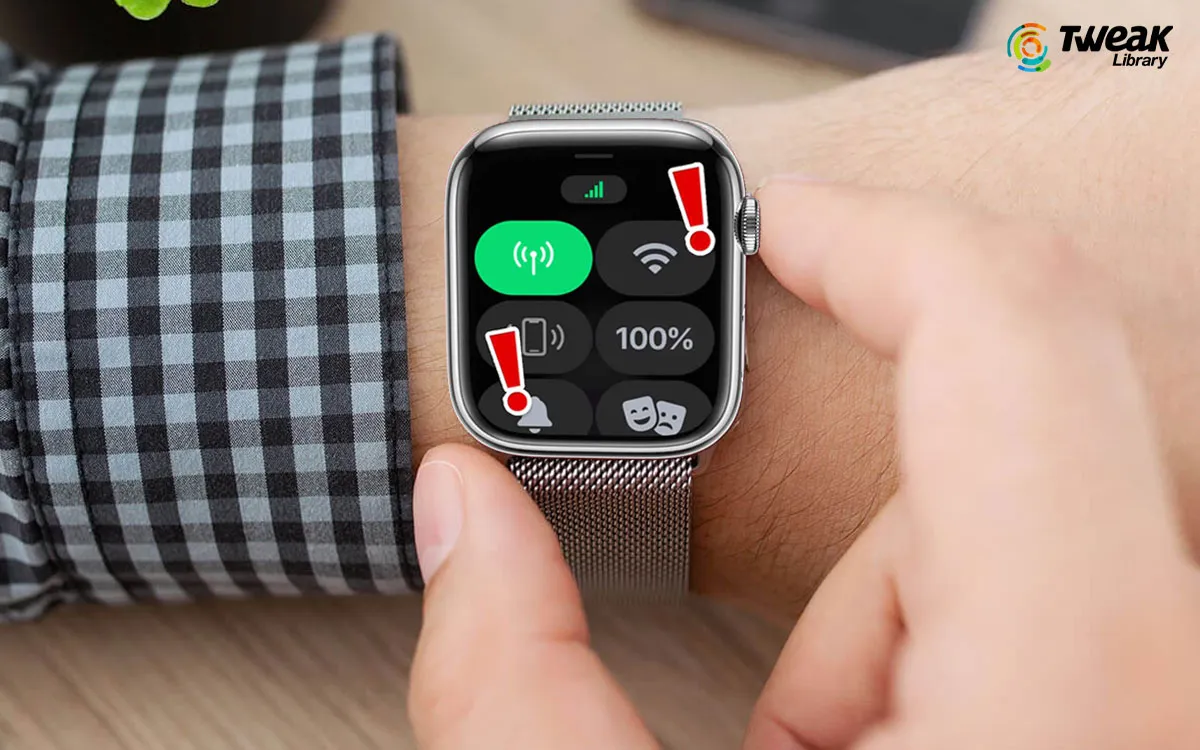
If you have paired your Apple Watch with your iPhone, you can make and receive calls and send and receive messages without your iPhone. Shocked? All such functions are part of the Apple Watch Cellular.
However, when Cellular stops working on your Apple Watch, these features are also non-operational. If you are also struggling with this issue, do not worry.
This post will discuss solutions to fix Cellular not working on your Apple Watch and quickly get it back on track.
Certains Things That You May Want To Check
Before you tweak the settings, whether in your Apple Watch or the iPhone it is connected to, you may want to rule out the following –
- Check if cellular coverage is adequate in your area. In many cases, the Apple Watch cellular ceases to function properly if there are coverage issues.
- Ensure you are subscribed to a cellular service plan and have paid for the services.
- If Airplane mode is activated on either the Apple Watch or the iPhone, it is connected to disable it.
- The Apple Watch cellular should be properly configured. If it isn’t, follow these steps to configure it:
Step 1 – Open the Watch app on your iPhone.
Step 2 – Navigate to Mobile Service. Tap on Set Up Mobile Service.
If you see grey text or an error message, you may need to contact your SIM provider for further assistance.
Step 3 – Follow the on-screen instructions.
Things To Do If Cellular is Not Working On Apple Watch
Solution No.1 – Restart Apple Watch
As with any device, you can restart your Apple Watch and fix the issue of the Apple Watch cellular not working. Try this workaround before you opt for any advanced steps.
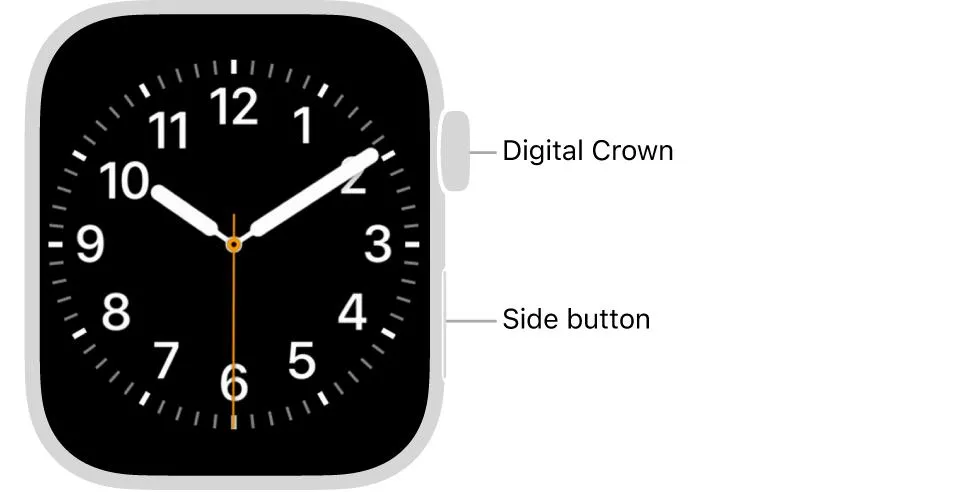
To force restart your Apple Watch, press and hold the side button and the digital crown until you see a black screen and the Apple logo appears. Release both the buttons and wait for your Apple Watch to restart.
Solution No.2 – Turn the Cellular on And Off
Step 1 – Swipe up from the bottom of the watch to open the Control Panel.
Step 2 – Tap on the cellular to turn it on (tap on the icon next to the Wi-Fi icon) and then turn it off again.
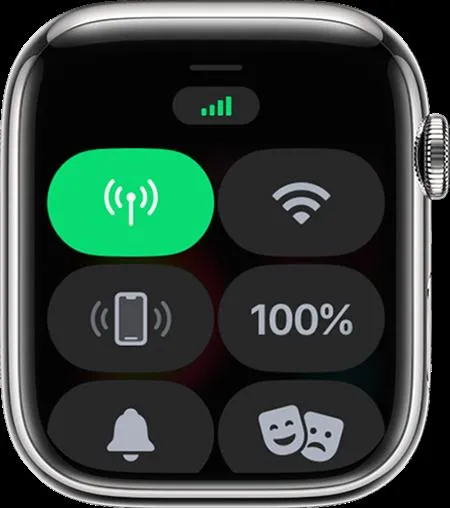
Step 3 – Wait approximately 10 seconds and tap on it to turn it back on.
Turn On The Airplane Mode and Turn It Off Once Again
Although we suggested disabling airplane mode to get the cellular working as a workaround that has worked for many users, they switched on airplane mode for 10 seconds and then turned it off. Try this and see if it helps.
Solution No.3 – Set Up Cellular Correctly
Ensure that you have set up cellular on your Apple Watch correctly –
Step 1 – Open the Apple Watch paired with your iPhone.
Step 2 – Tap on the My Watch tab > tap Cellular.
Step 3 – Select Set Up Cellular. Tap on Set Up Cellular again.
Step 4—You will receive specific instructions for your mobile carrier. You might also be required to confirm your identity to add the Apple Watch to your plan and contact your carrier to complete the setup process.
Solution No.4 – Reset Apple Watch
Until now, if you have had no luck fixing the cellular feature on your Apple Watch, try resetting the watch. To do that :
Step 1 – Open Settings on your Apple Watch.
Step 2 – Select Reset.
Step 3 – Tap on Erase All Content and Settings.
Step 4 – Tap on Erase All.
Solution No.5 – Remove/ Re-add Your Plan
You can remove or re-add your carrier plan if cellular is not working on your Apple Watch. To do that –
Step 1 – On your paired iPhone, open your Apple Watch app.
Step 2—In the app, tap on the My Watch tab > Cellular, and then click on the i next to your plan.
Step 3 – Select Remove [plan name]
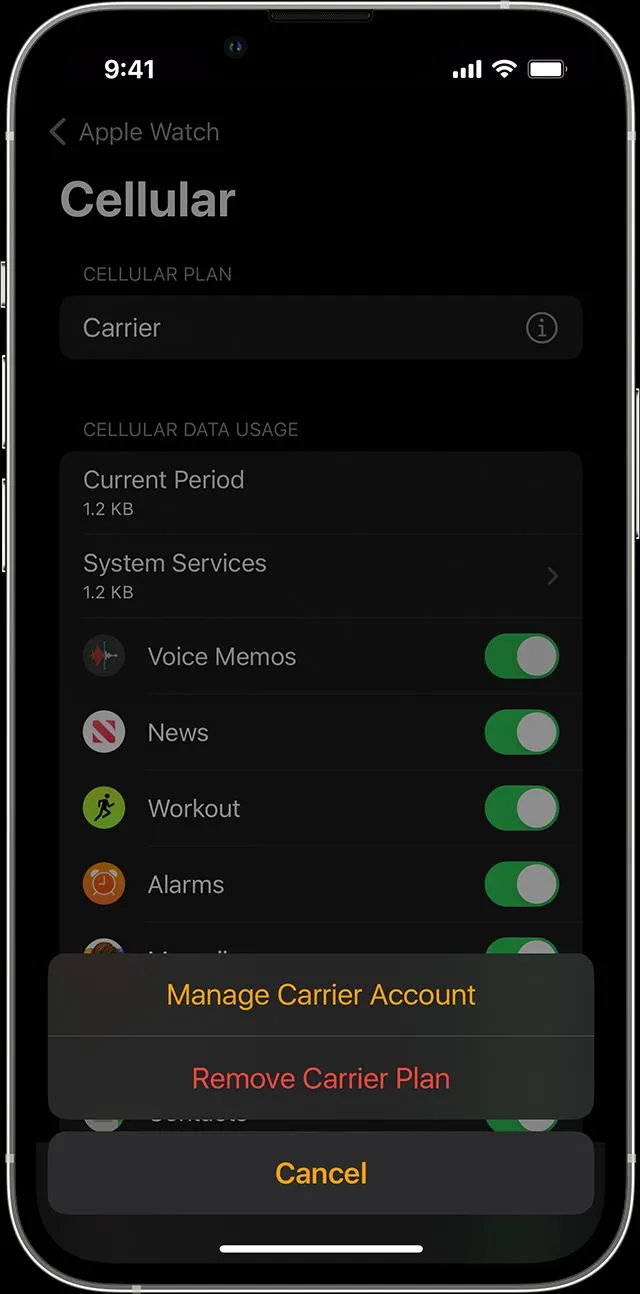
Step 4 – Confirm the process.
Once you have removed the plan, you must set it up again.
To Conclude
If you are sure that you have enough data left in your plan and you have not reached a cap, you can try the solutions mentioned above to fix cellular not working on Apple Watch.
If you have been able to fix the issue, let us know in the comments section below. For more such content, keep reading Tweak Library.


Leave a Reply