Taking a screenshot, A still photo on your iOS is pretty simple and I guess all of us are aware of the trick. We know the 2-button trick that grabs a photo of our screen and saves it in our photo album however far fewer people are aware of the trick to record your phone’s screen.
That’s a very simple process. Once the settings are done, you may open different Apps or scroll through any screen you wish to record. You can also add voice or music to the screen recording and share the file with anyone or on YouTube.
You just need to keep in mind that you need to enable the feature from ‘Control Center’ and the procedure of getting to the record feature totally depends on the version of iOS you are using.
So let’s get on to steps to enable the inbuilt feature of screen recording on iOS 11 and above.
If you are a ‘Perfectionist’, check out these Advanced Apps for screen recording and direct sharing.
How To Enable Screen Recording Feature?
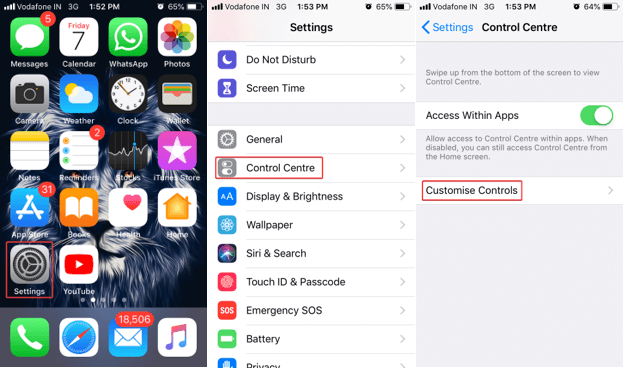
Step 1. Open ‘Settings’ page of your device and navigate to ‘Control Center’.
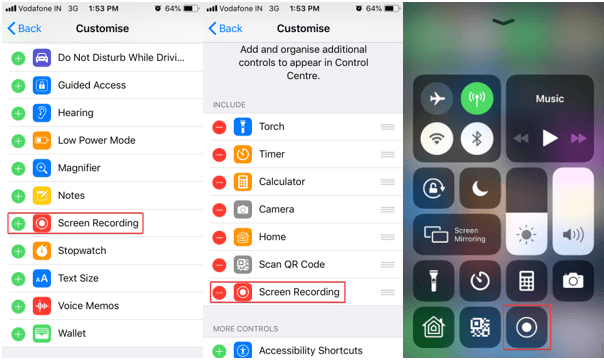
Step 2. Tap on ‘Customize Controls’ and look for ‘Screen Recording’ option.
Note: If it’s in {Included} list with a Red (-) tick, means it’s already enabled else you will find it under {More Controls} list with a (+) sign. Click on Green (+) sign to enable screen recording and it will appear in {Included} list.
Once you are done with the recording and if you want to remove it from ‘Control Center’ you need to come back here and click on it again to remove it from the {Include} list.
How To Record Your Screen
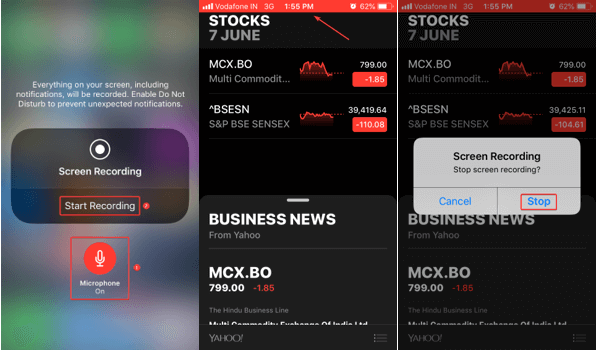
Step 1. Open the screen or App from where you want to start recording.
Step 2. Swipe up the screen to open ‘Control Center’. For iPhone X or later and iPad with iOS 12 and above, you need to swipe down to open ‘Control Center’.
Step 3. Tap on the screen recording button.
Note: After a countdown of 3 seconds, the screen recorder will start recording your screen. The record button will turn red and if you close the ‘Control Center’, you will get to know the recording is still turned ON by looking at the red strip on the top.
To stop recording, you may tap on the red strip on the top and choose ‘Stop’. Alternatively, you may also pull up the ‘Control Center’ and tap on the ‘Screen Recorder’ button to turn it Off.
Screen Recording With Voice
If you want to record your voice with screen recording or narrate a video recording, you just need to follow a simple step.
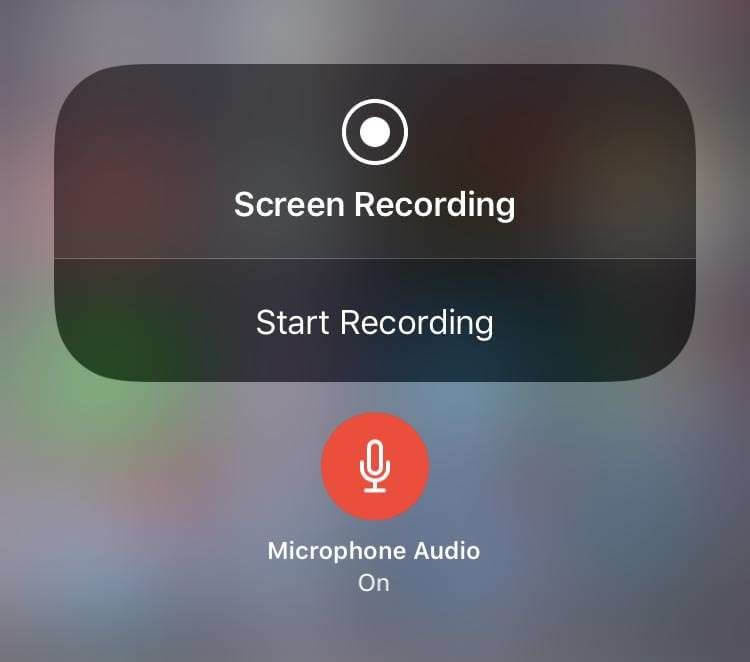
Step 1. Scroll up or down to pull the ‘Control Center’ according to your device.
Step 2. Tap and hold down the screen recorder button. Instead of starting the countdown, it will show you screen recording options. Tap on the ‘Microphone’ icon and it should change from Off to ON.
Step 3. Now you are good to go to start recording with voice enabled. Record your screen as you normally do, it will also record the external voice.
Note: If you only want to record the audio of an App, you need to keep the Microphone turned OFF, but your iPhone’s ringer should be turned ON. If you turn the Microphone OFF and have your ringer Off (silent), the screen recording will also be silent.
Find And Edit Your Recording
All your recording will be available in the Camera Roll folder.
Step 1. Open Photos App and your recording shall be listed in the newest items.
Note: If you wish to trim the Start and End point of your video, you can edit the video recording and save it as a new video clip so as to keep your original video intact.
Step 2. Tap on the video you want to edit.
Step 3. Tap on the ‘Edit’ option on the top of the screen.
Step 4. At the bottom of the screen, it will show you snippets of the video. Scroll yellow bar to set the start and End point of the video. You may play it to ensure the perfect cropped clip.
Step 5. Tap ‘Done’ and tap on ‘Save As New Clip’ to create a copy.
Also Read: iOS 12 Hidden Features That You Should Know
Advanced Screen Recording Apps for iPhone
Here is a list of Top 3 Best Screen Recorder App for iPhone and iOS devices.
1. TechSmith Capture
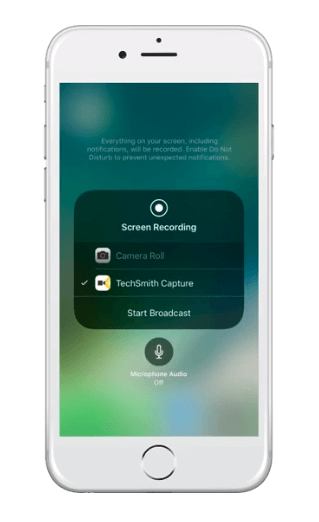
TechSmith Capture is one of the best powerful Screen Recording Apps for your iOS devices. It allows you to easily record videos of Apps, Games and other content for presentations, video demos, and tutorials. It is loaded with smart features to record a screen with Audio, Edit the video and share it directly on social media.
Benefits:
- Demonstrate a Process – Record a process with audio commentary on your iOS screen.
- Give Feedback – Review documents and images, and record and share feedback right from your device.
- Create App Store Videos – Create App Store Apps review and record how the App works.
- Game Screen Recorder – Record your gameplay with commentary and share your best gaming moments with your friends.
2. Record It
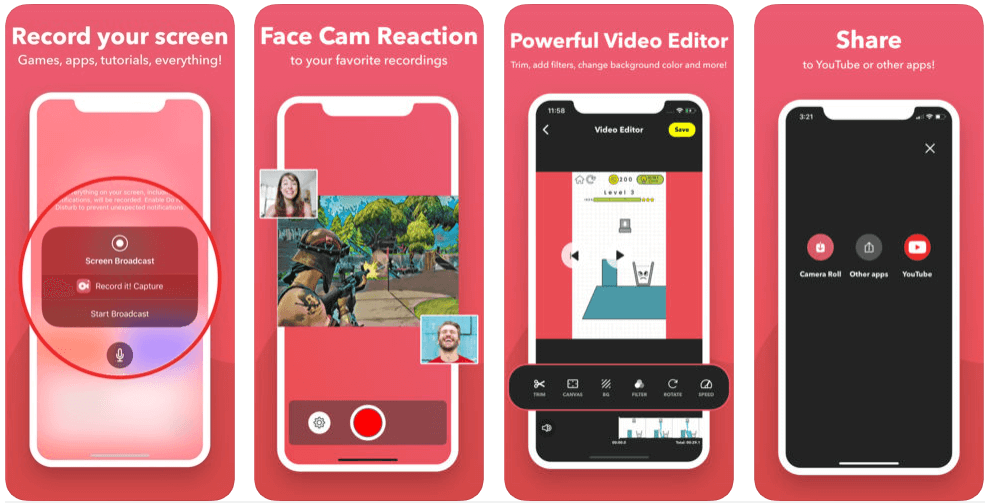
App Features:
- Smartly record full-screen videos using the screen recording API for iOS 11.
- Add video reactions on the video along with audio comments or narration.
- Supports iOS game screen recorder for Gameplay recording, Video tutorials, etc.
- Edit recorded videos with the ‘Video Trim’ feature on the App.
- Organize recordings with different sorting options with easy access on the App.
- Share / Export the recordings on an Email or AirDrop effortlessly.
- The free version comes with a limitation of 3 minutes. Purchase the Pro App without limitations and advanced features for an additional cost.
3. Web Recorder
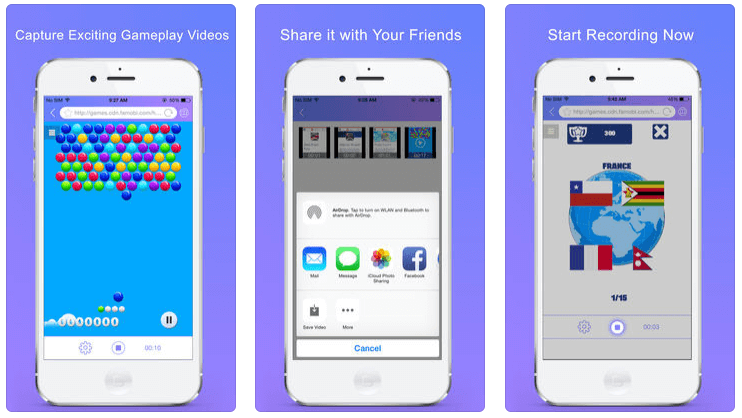
- One of the best Game Recorder Apps to record games on iOS devices.
- Easy to use and handy App to record the screen in HD Quality with clear audio.
- One tap feature to export the video to another device or share on YouTube, Facebook, and Twitter.
- Bookmarks and Favorites option available for quick and specific access to specific sites.
Wrapping Up
Record your screen with inbuilt iOS Screen Recorder or use best Screen Recorder Apps for most innovative videos. Try out the best game screen recorders and directly upload your edited videos on social media platforms. If you want to share any useful tips and tricks on the screen recording process using iPhone or iPad using the inbuilt iOS Screen Recorder tool, please share them in the comments below. Do let us know about your experience with third party Apps listed above.
For more such tips, tricks and tech related updates subscribe to Tweak Library and if you are more into tech-related videos do watch and subscribe to our YouTube channel. You could also reach us on Facebook and Pinterest.


Leave a Reply