
We are going to discuss the Windows Data Execution Prevention feature and how to disable it. But before proceeding ahead, do you know what is Data Execution Prevention on Windows 10?
Well, Data Execution Prevention is a Windows 10 in-built feature that prevents virus attacks or other security threats.
DEP also helps the computer system stay protected by identifying programs to make sure that they are using memory safely.

Moreover, DEP uses a set of hardware and software combinations to check on Windows computer memory to halt malicious codes from executing.
But we are sure one question must be buzzing in your mind!
When DEP helps computers stay away from malicious attacks then what is the need of disabling it?
Truth be told, Yes, DEP secures your computer from viruses and security threats, and determines the program to use the memory securely. But, if you are thinking, it will prevent harmful software or programs to get installed in your system than you are wrong.
Well, Data Execution Prevention (DEP) can be considered as a blessing and curse both.
If DEP in Windows does its job perfectly without interfering with the programs, it’s a high-five from us.
But when it starts popping up, closes the 32-bit programs or stops CyberStorm video game, then things become complicated.
Hence, here we explain how to resolve this issue by disabling DEP.
Go through the complete article, and understand the procedure to Turn Off DEP.
Fix 1 – Start With Data Execution Prevention Windows
- Type Control Panel in the search box and hit enter.
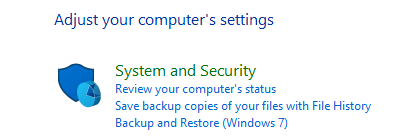
- Select System and Security option.
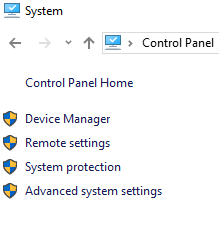
- Choose System from the right pane and click to open.
- Find Advanced system settings on the left pane. Right-click on it > a pop up will appear.
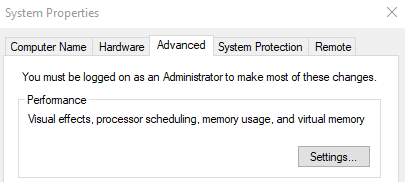
- Click on the Advanced tab > Settings option.
- Now, click on Settings and go to the Data Execution Prevention tab. Search for the option that reads, Turn On DEP for all programs and services except those I select:
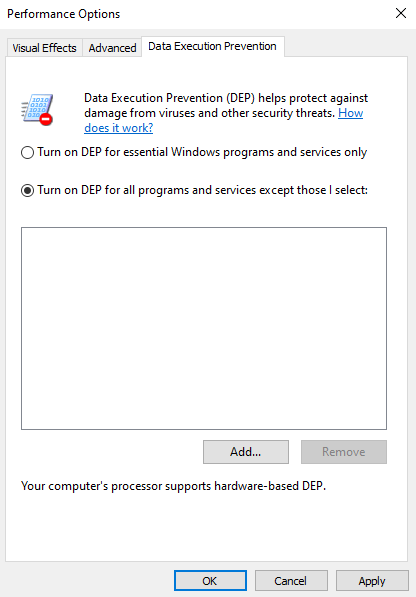
- Here, add the desired programs, you want DEP to interfere with.
- Click Apply > OK to save changes.
Fix 2- Turn Off DEP Via Command Prompt
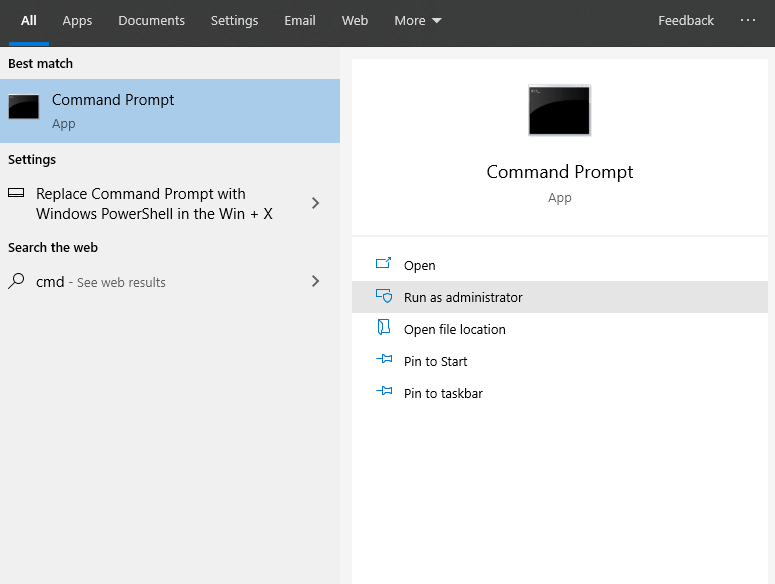
- Type Command Prompt in the search box. Right-click on it and select Run as an administrator to perform all the actions.
- In CMD window enter exe /set {current} nx AlwaysOff. Hit enter.
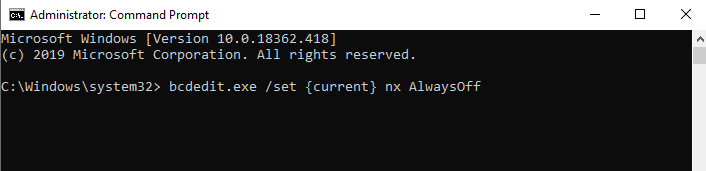
- Restart your computer. This will disable DEP feature permanently.
Above we explained possible methods to help turn off Data Execution Prevention on Windows 10.
But as you know, Windows Data Execution Prevention tool will not protect your computer system fully. Therefore, we would like to suggest using Advanced System Optimizer. It is a system optimization tool that offers, spyware cleaner, junk cleaner, privacy protector, data recovery tool, registry cleaner, hard disk optimizer, and more such features.
This tool performs the below list of actions on your system.
- Protects Your System from Attacks
- Updates System’s Drivers
- Clean Junk File
- Optimize System’s Hard Disk
- Game Optimization
These are a few of the features the list goes on. To know about all the feature you will need to download the product.
Final Word
Above are the possible ways to close DEP on Windows 10. With the help of these methods, you can easily understand the procedure of executing them. You can also try using Advanced System Optimizer a system optimization tool that will help safeguard and boost system performance.
I hope you like this article. If I missed out on something, feel free to share your views in the below comment section. Subscribe to our newsletter for some great tricks and tips.


Leave a Reply